


CodeBlocks is a cross-platform development environment written in C++ programming language and using wxWidgets library. It has an open architecture, thanks to which it can be scaled by plugins. It supports C, C++, D (with limitations) and Fortran. The program is developed for Windows, Linux and Mac OS X. It can be built from source for almost any Unix-like system, e.g. FreeBSD, PC-BSD. In this article, let's consider installing CodeBlocks Ubuntu 20.04 using apt package manager and from the official website.
Installing CodeBlocks
First, you need to update the package index using the command:
$ sudo apt update
Next, you need to install the codeblocks package using the command:
$ sudo apt -y install codeblocks
Once installed, the program can be found by typing the word code in the search in the main menu:

If when you try to install the program using the package manager apt command you get the error:"Unable to locate package codeblocks", then you need to enable the universe repository before installing the program. To do this, run the command in the terminal:
$ sudo add-apt-repository universeYou don't need to update the package indexes as the program will update them automatically. After that you can try to install the program again.
How to use Codeblocks
When you run the program for the first time, you will be prompted to select a compiler:

The compiler should already be present in the system beforehand. If the first time you run the program there is no compiler to choose from, you must install it. You can use the GCC compiler (considered standard for Ubuntu). Its installation is described in the article Installing GCC in Ubuntu 20.04.
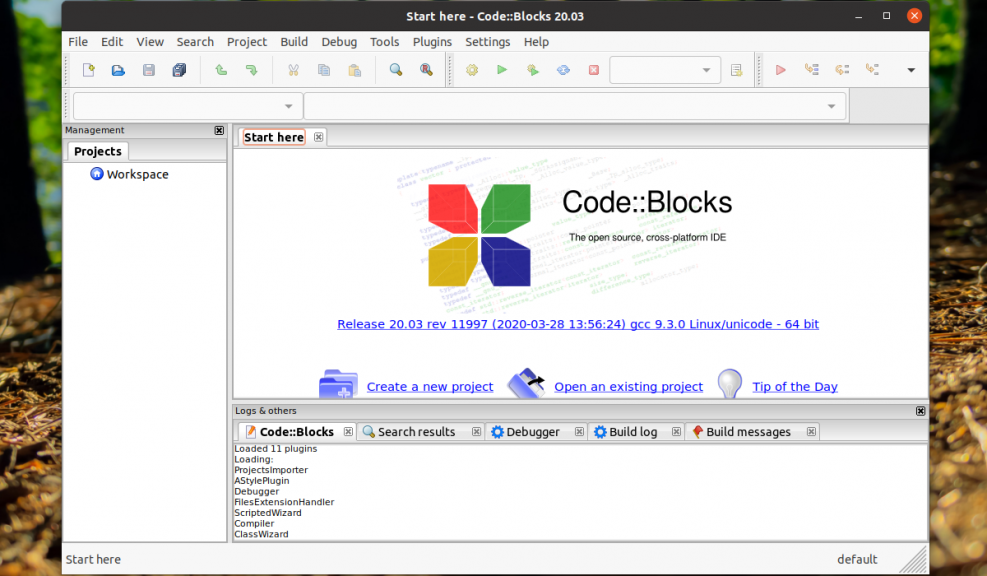
The main window of the program looks like this:
Creating a new project
To create a new project, select Create a new project in the main menu:

As an example, let's choose to create a console application by selecting this item in the drop-down menu at the top:

Next, select the programming language in which the application will be developed:

Next, you should set a name for the project and the path to the directory where the project will be stored:

In the last step, you can select a compiler and also set options for debugging. You can skip this step and click Finish:

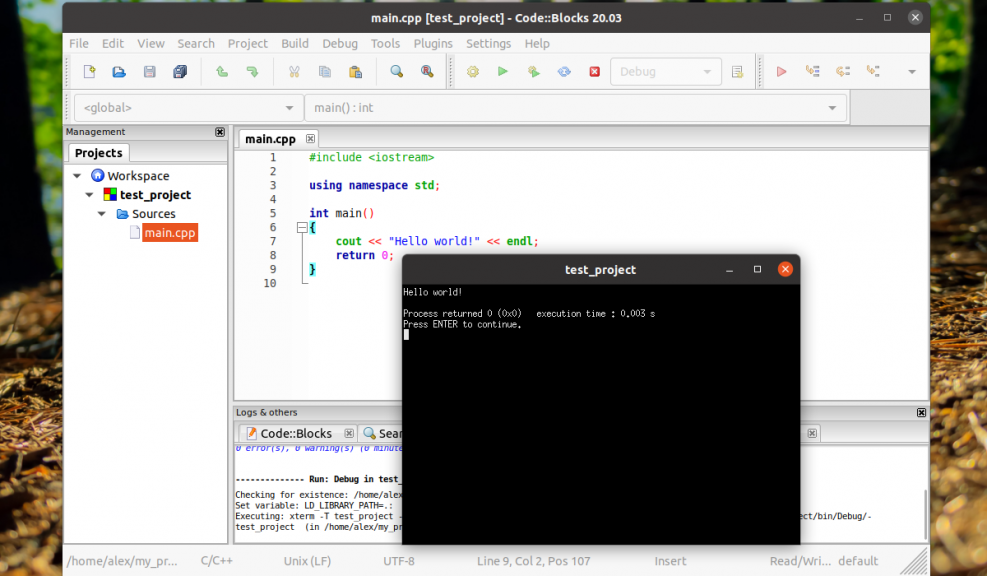
After writing the code, it must be built by clicking on the green arrow button. After building, the program will start automatically and the results will be displayed in the terminal:
The installation process itself is not difficult. You can also choose how to install the program.