


1Panel is a sleek, modern server control panel that puts day-to-day ops—sites, databases, users, certificates, tasks—into a clean web UI. No shell kung-fu required. Below is how to deploy it straight from TheHosting billing and set your own login and password during install.
Requirements
- An active VPS at TheHosting.
- Supported OS on the server: Ubuntu 22.04 / 24.04 or Debian 11 / 12.
If your VM runs something else, reinstall to one of the above first.
Install 1Panel (you choose the credentials)
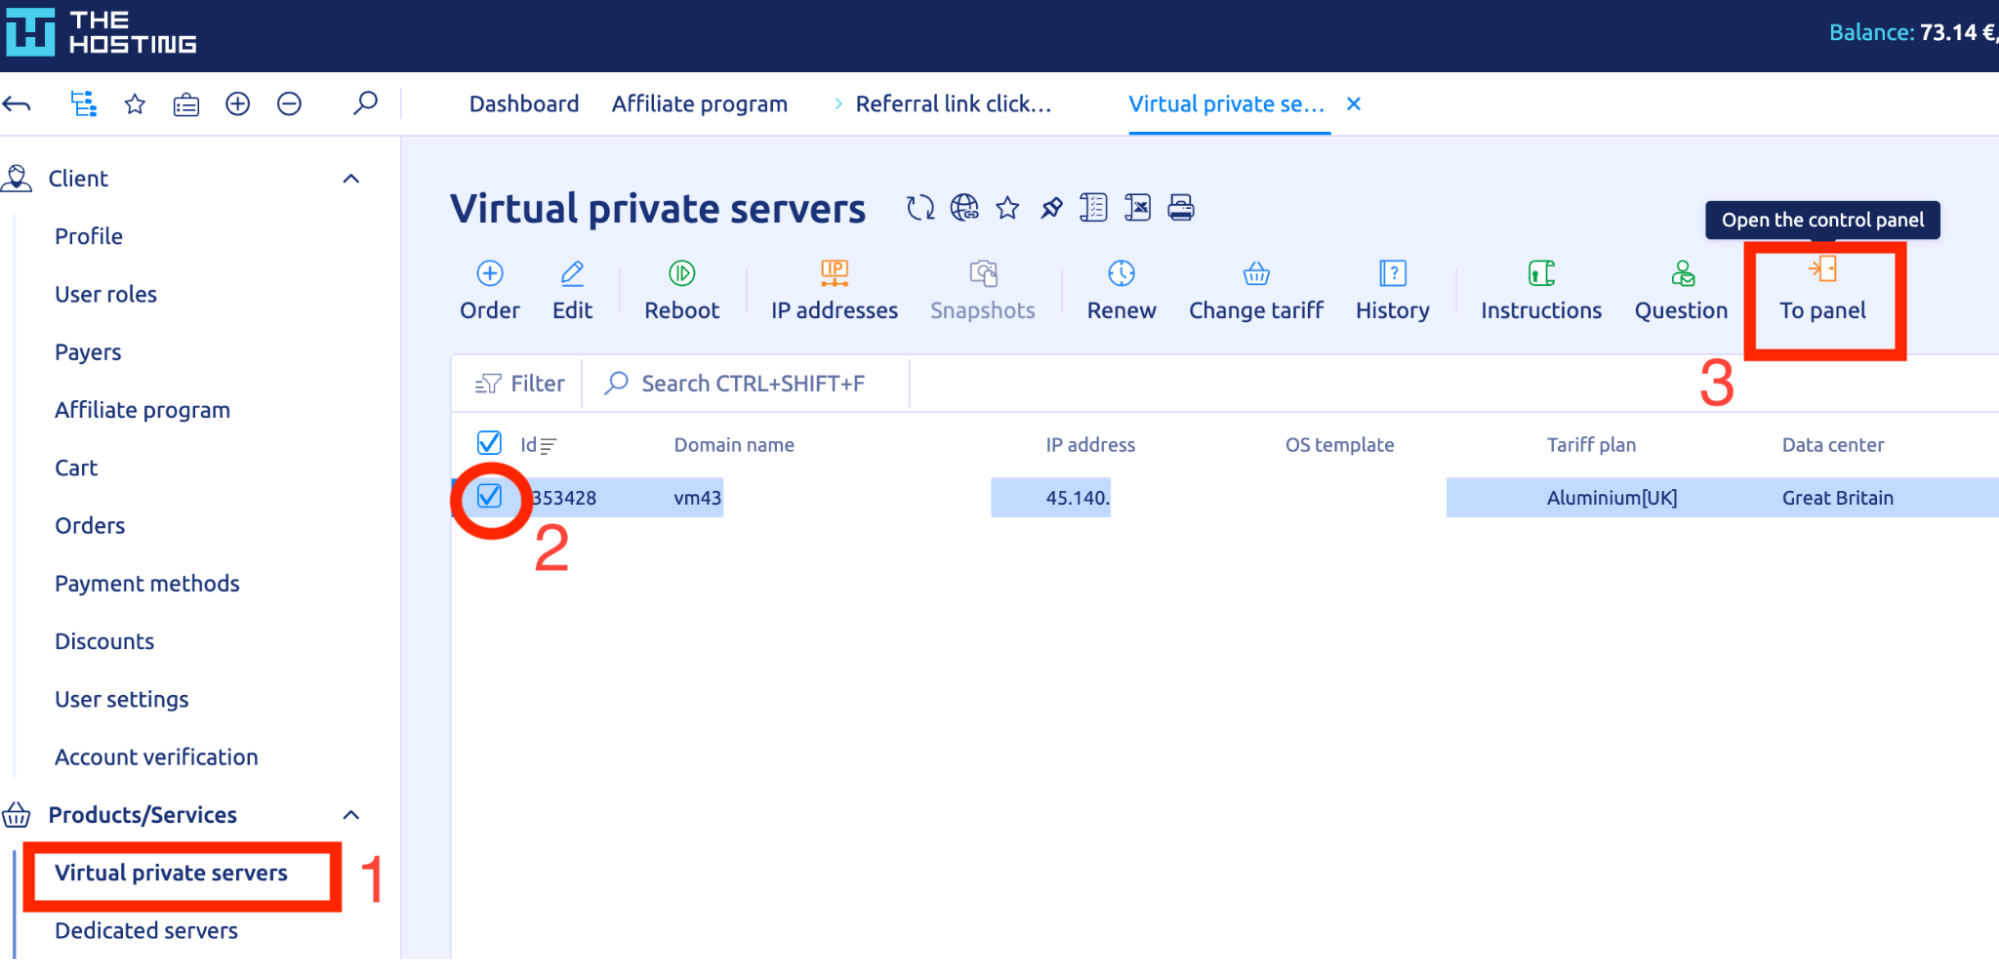
- Open VMmanager from billing
- In Products/Services → Virtual private servers, select your server and click To panel to open VMmanager.
Start the installer
1. In the VM list click ⋯ → Run script.
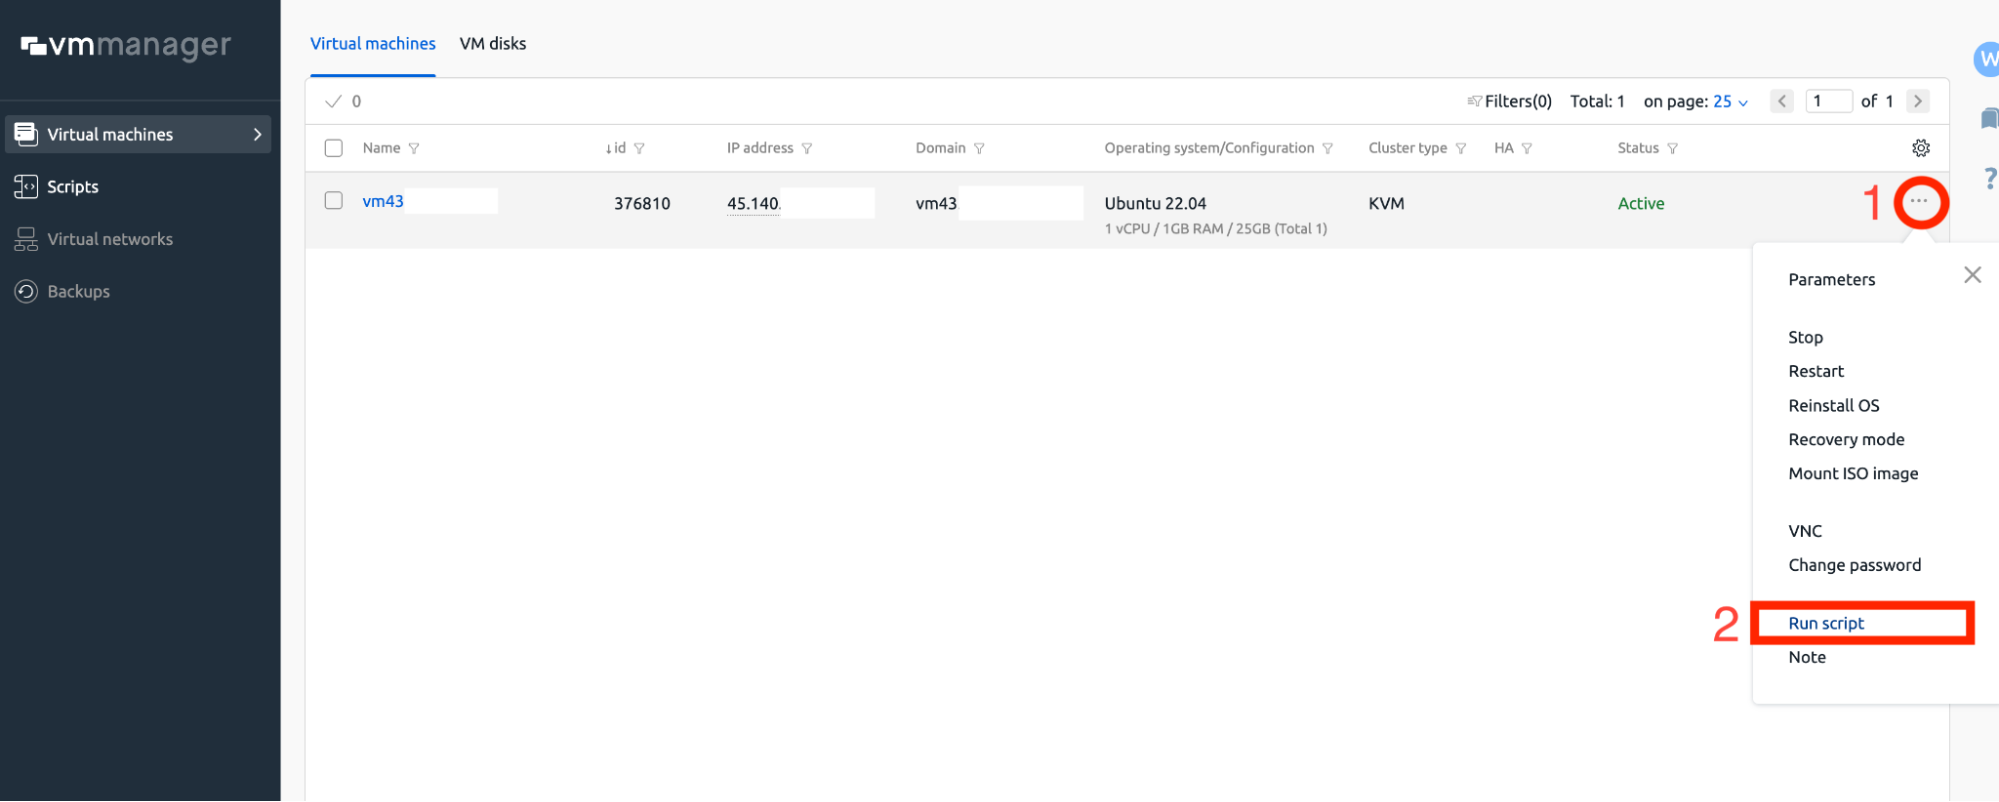
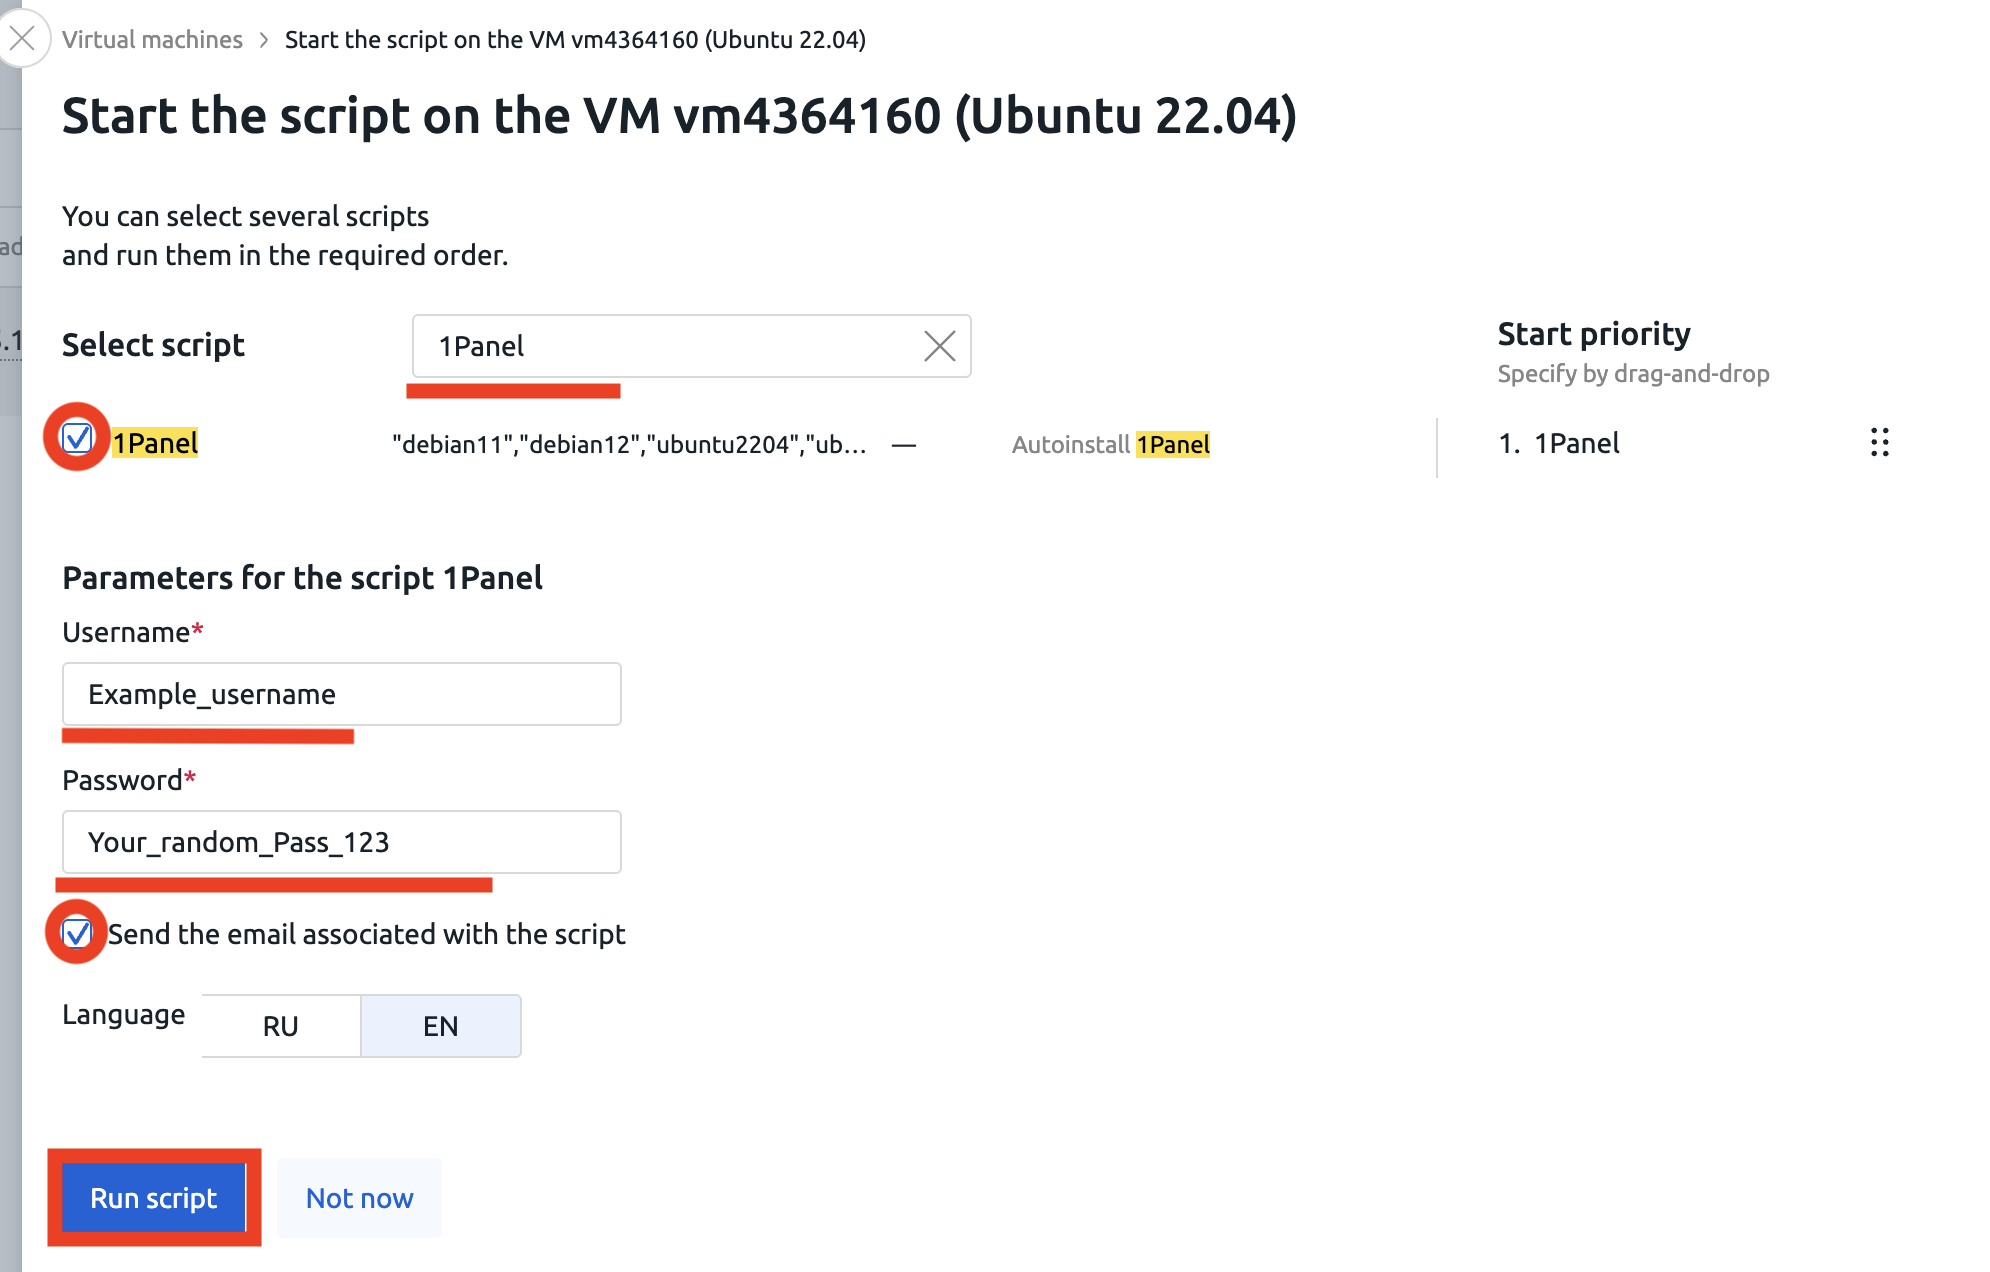
2. Pick the script
3. Search for 1Panel, tick 1Panel (you’ll see supported OS in the hint).
4. Set panel credentials
- Username — any login you want for 1Panel.
- Password — a strong password (12+ chars, mixed case, numbers, symbols).
These will be your credentials for the web UI.
5. Tick Send the email associated with the script — you’ll receive the access URL (including port and the security entrance path).
6. Choose RU or EN for the email language and click Run script.
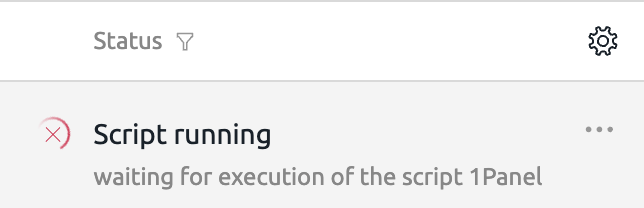
The status will show Script running while the install completes.
First login
By default, 1Panel listens on port 8080 and uses an extra security path in the URL. Open: http://<server_IP>:8080/<your_security_entrance>
The server IP is visible in VMmanager and in billing.
The security_entrance value is in the email from step 5.
Sign in with the Username and Password you set on step 4.
Tips
- Change password: you can update it later inside 1Panel settings.
- Re-deploy: re-running the script on a clean supported OS will reinstall the panel.