


VestaCP is a lightweight, open-source server control panel that makes it easy to deploy web servers, databases, mail services, and manage domains through an intuitive web interface. Installation via VMmanager is fully automated and takes just a few minutes.
Supported OS: CentOS 7
Only installs on a clean system.
Accessing the server management panel
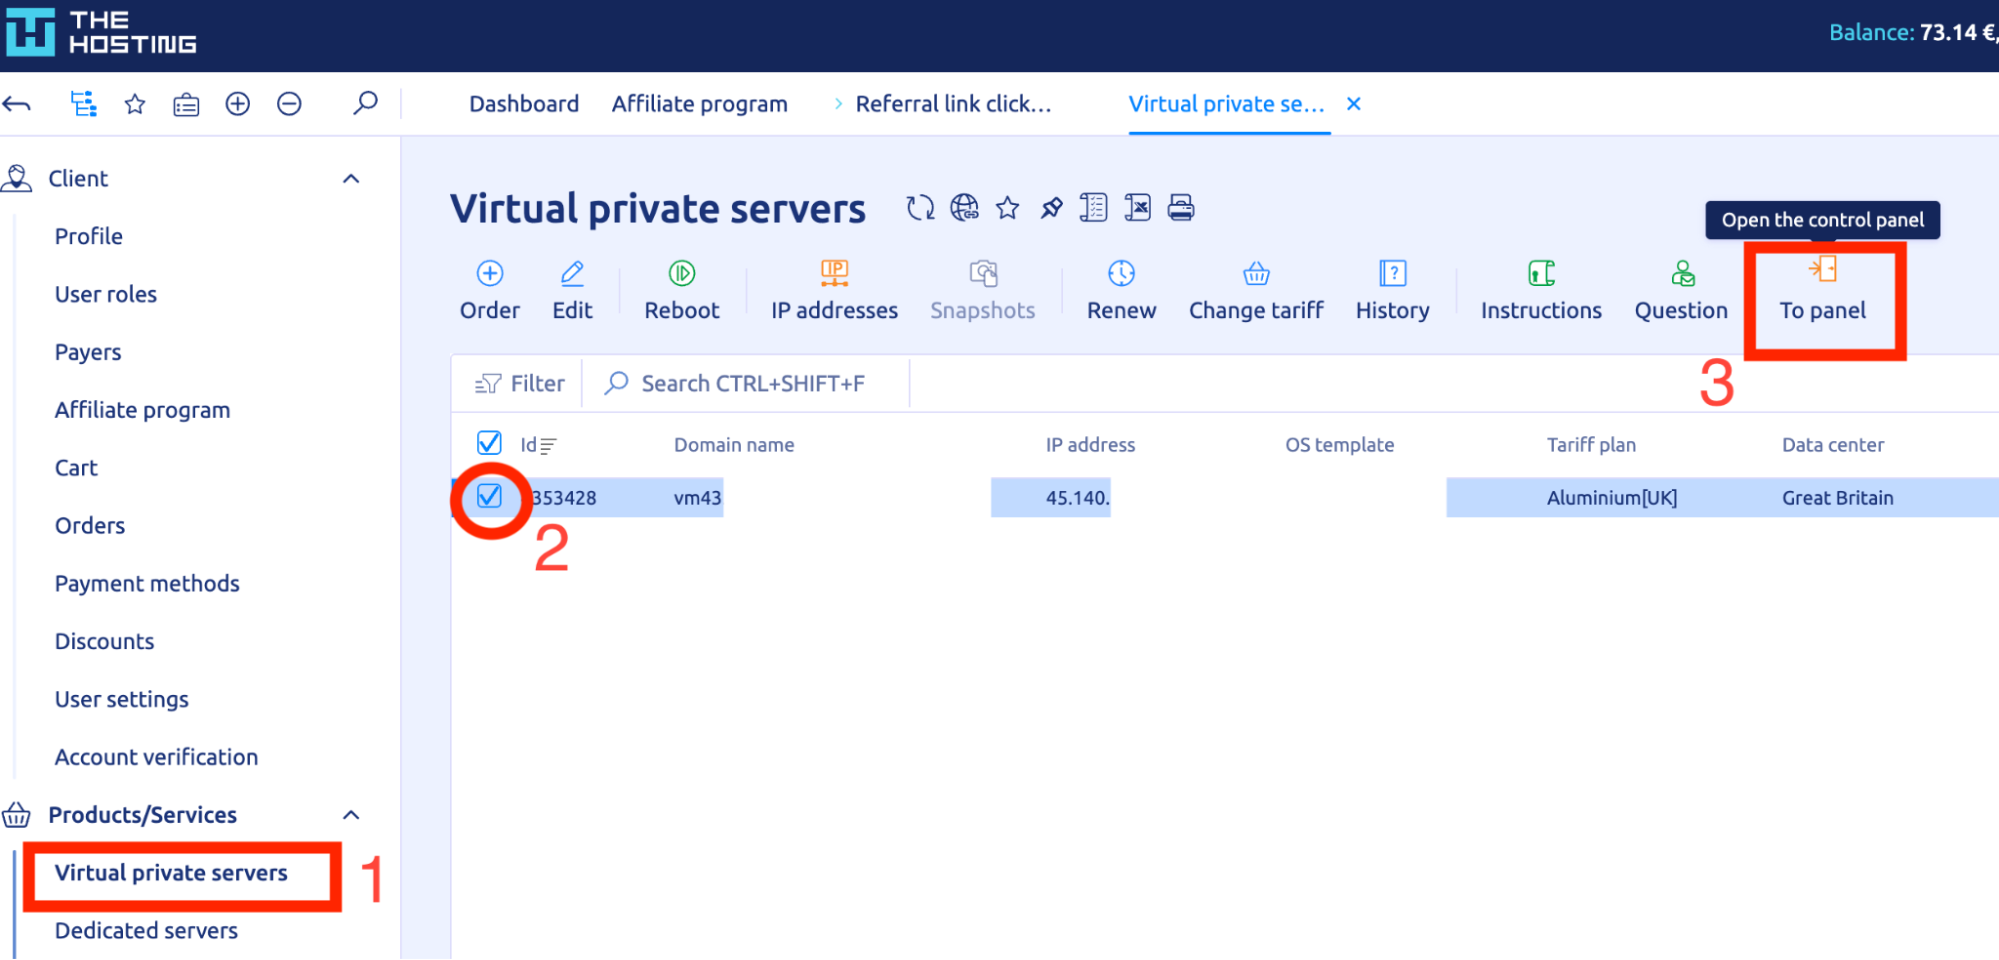
- In the THE.Hosting billing panel, go to Virtual private servers.
- Locate the required VPS and click To panel — this will open the VMmanager interface.
Running the installation script
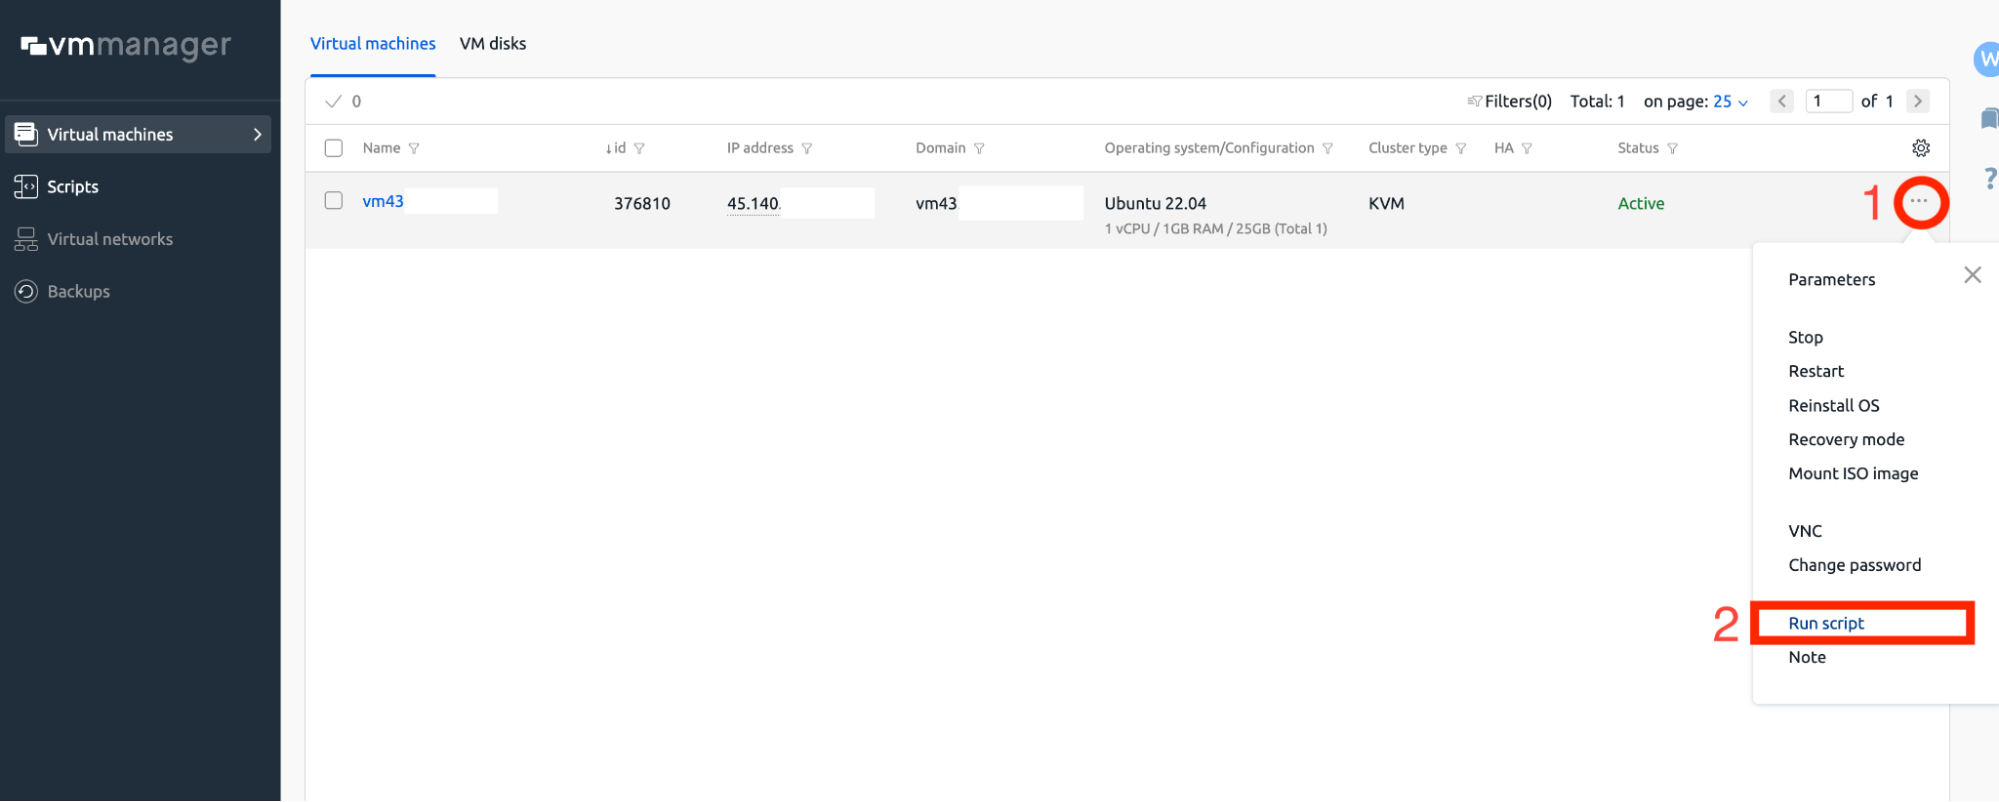
1. In VMmanager, click the three dots on the right side of your server’s name.
2. From the dropdown menu, select Run script.
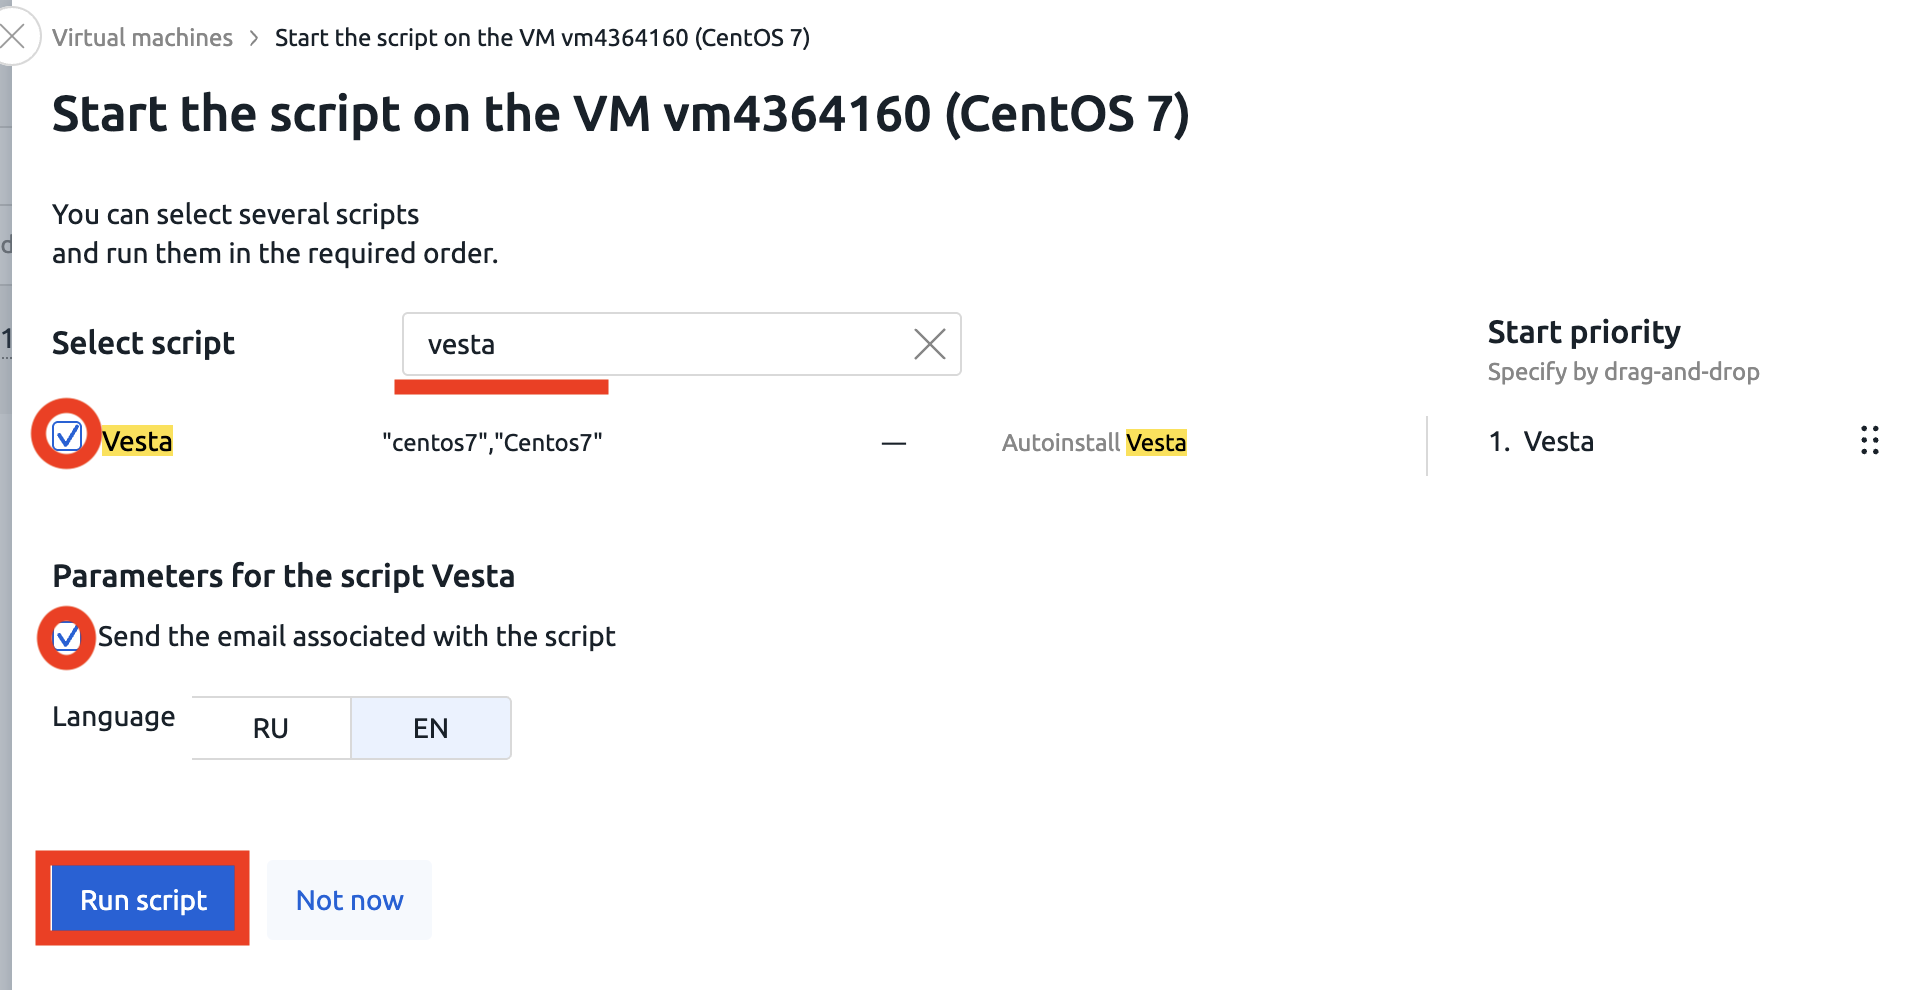
3. In the search field, type vesta and select the VestaCP script.
4. Make sure the listed OS is compatible — for VestaCP, it’s centos7.
5. Click Run script to start the installation.
Waiting for completion
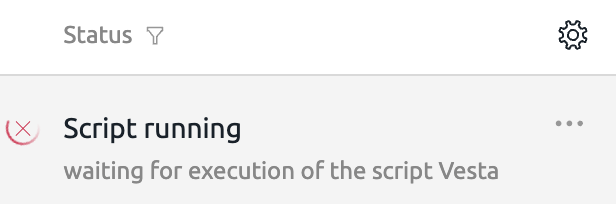
Once started, you’ll see the Script running status, indicating the installation is in progress. This usually takes 5–10 minutes. You can work on other tasks while it completes.
Accessing the panel
After installation, the panel will be available via HTTPS on port 8083: https://<server_IP_address>:8083
Example: https://45.140.xxx.xxx:8083
Login credentials are generated automatically and sent to the email address registered with your account.
After installation
If you plan to install other software, it’s recommended to reinstall the OS first — the auto-install works only on a clean system. You can do this in VMmanager by selecting Reinstall OS.