


Virtualmin is a powerful and flexible control panel suitable for both web hosting and general server administration. It allows you to create and manage virtual hosts, databases, mail services, and DNS records through an intuitive web interface. Installation via VMmanager is fully automated and takes only a few minutes.
Supported OS: Debian 11, Debian 12, Ubuntu 22.04, Ubuntu 24.04
In this example, we will use Ubuntu 22.04.
Step 1: Access VMmanager
- Log in to the Billing section of THE.Hosting.
- Go to Virtual private servers and select your VPS.
- Click To panel to open VMmanager and access server management tools.
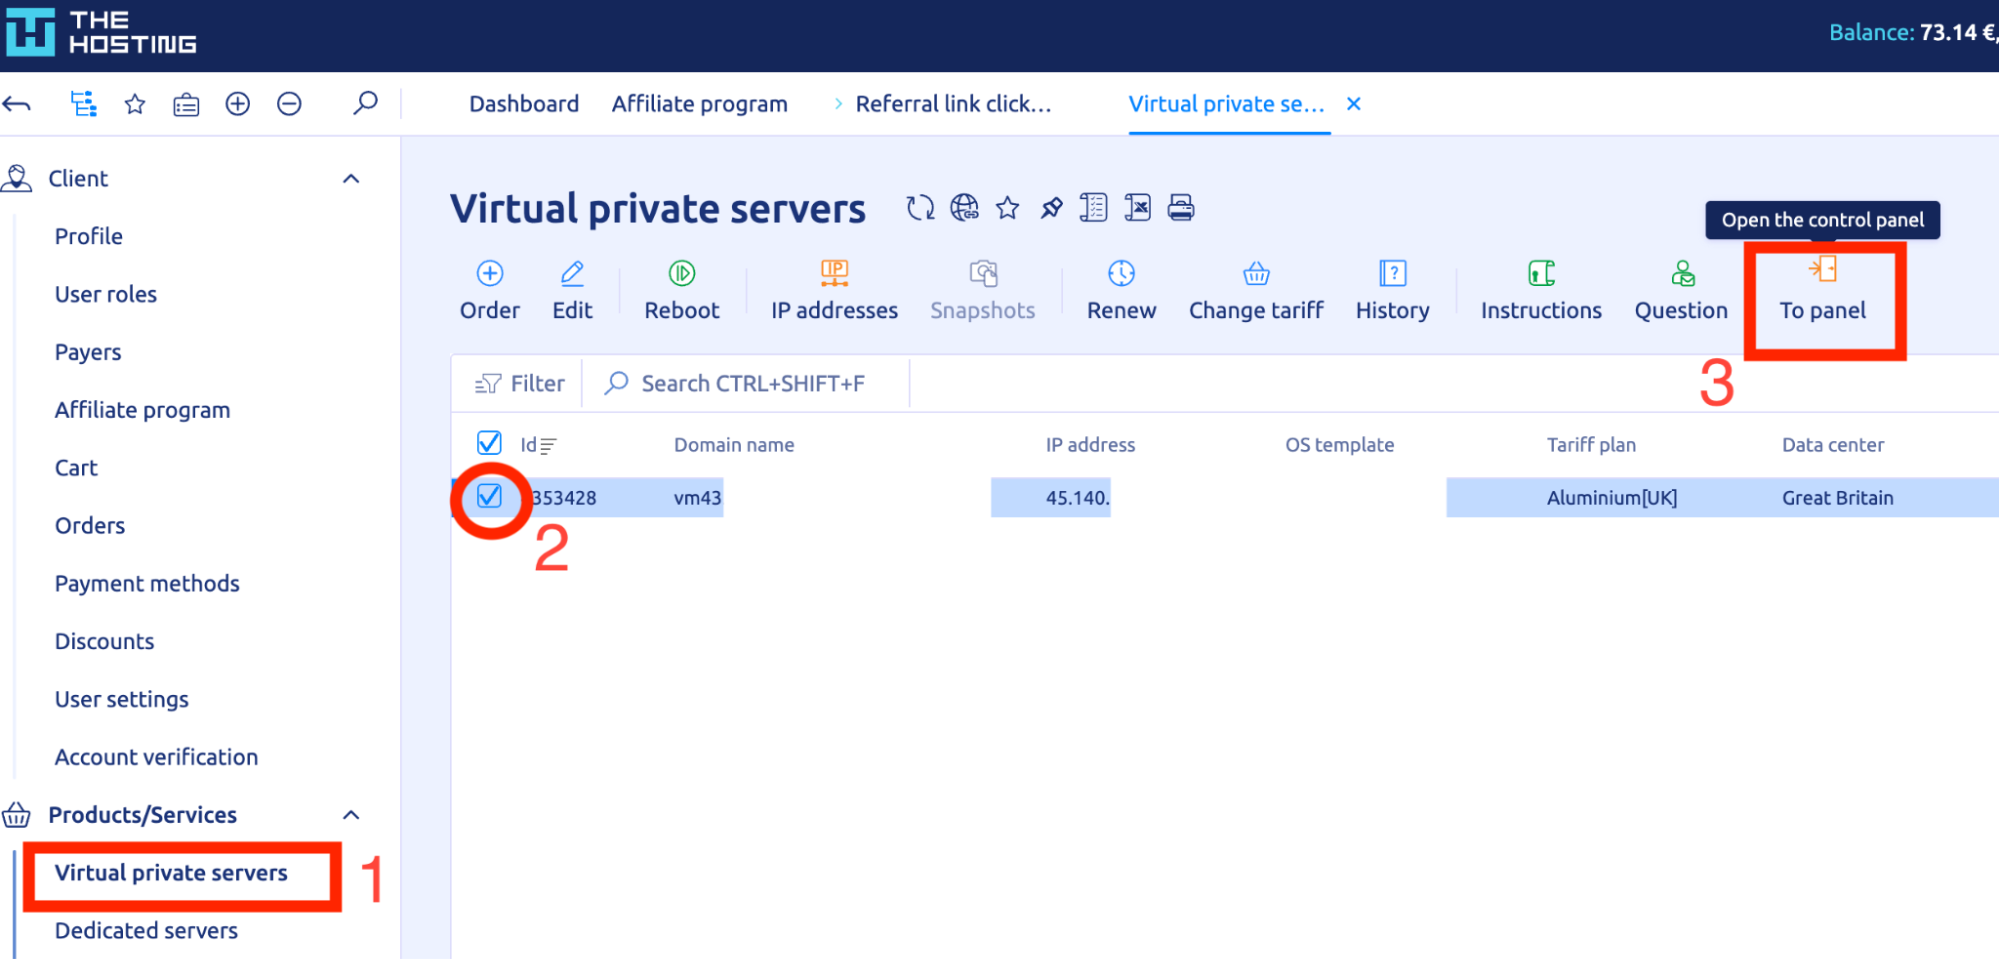
Here, you can restart the server, reinstall the OS, run installation scripts, and perform other management tasks.
Step 2: Start the Virtualmin Installation
1. In VMmanager, click the three dots next to your VPS name.
2. Select Run script.
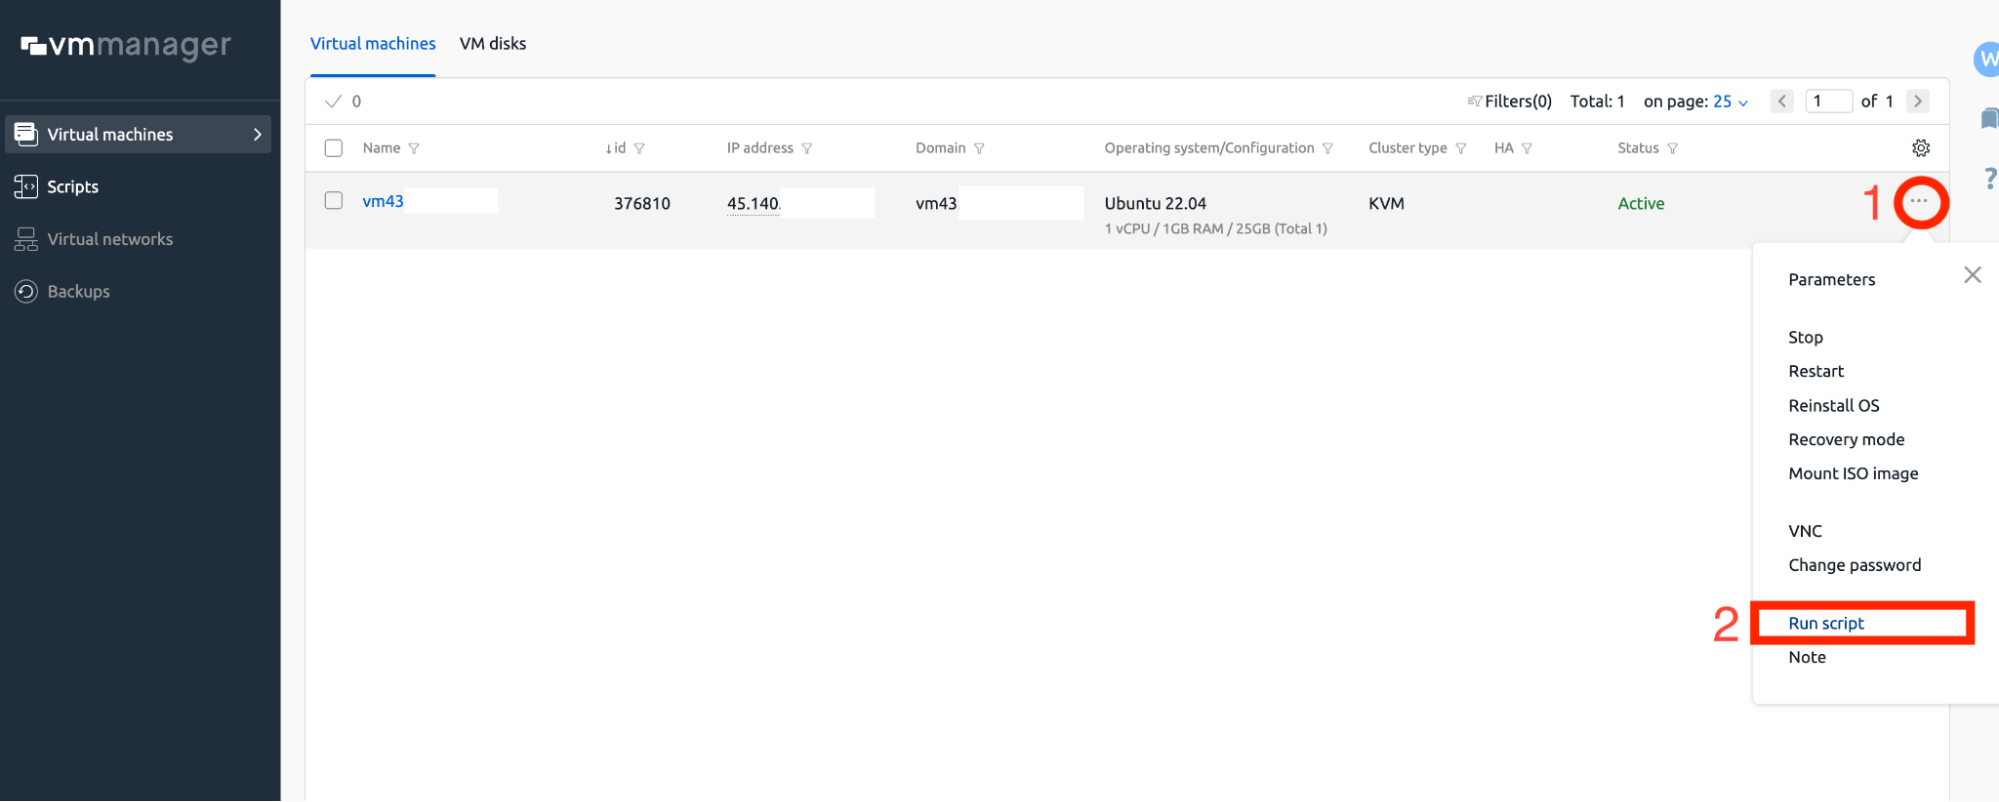
3. In the search bar, type Virtualmin.
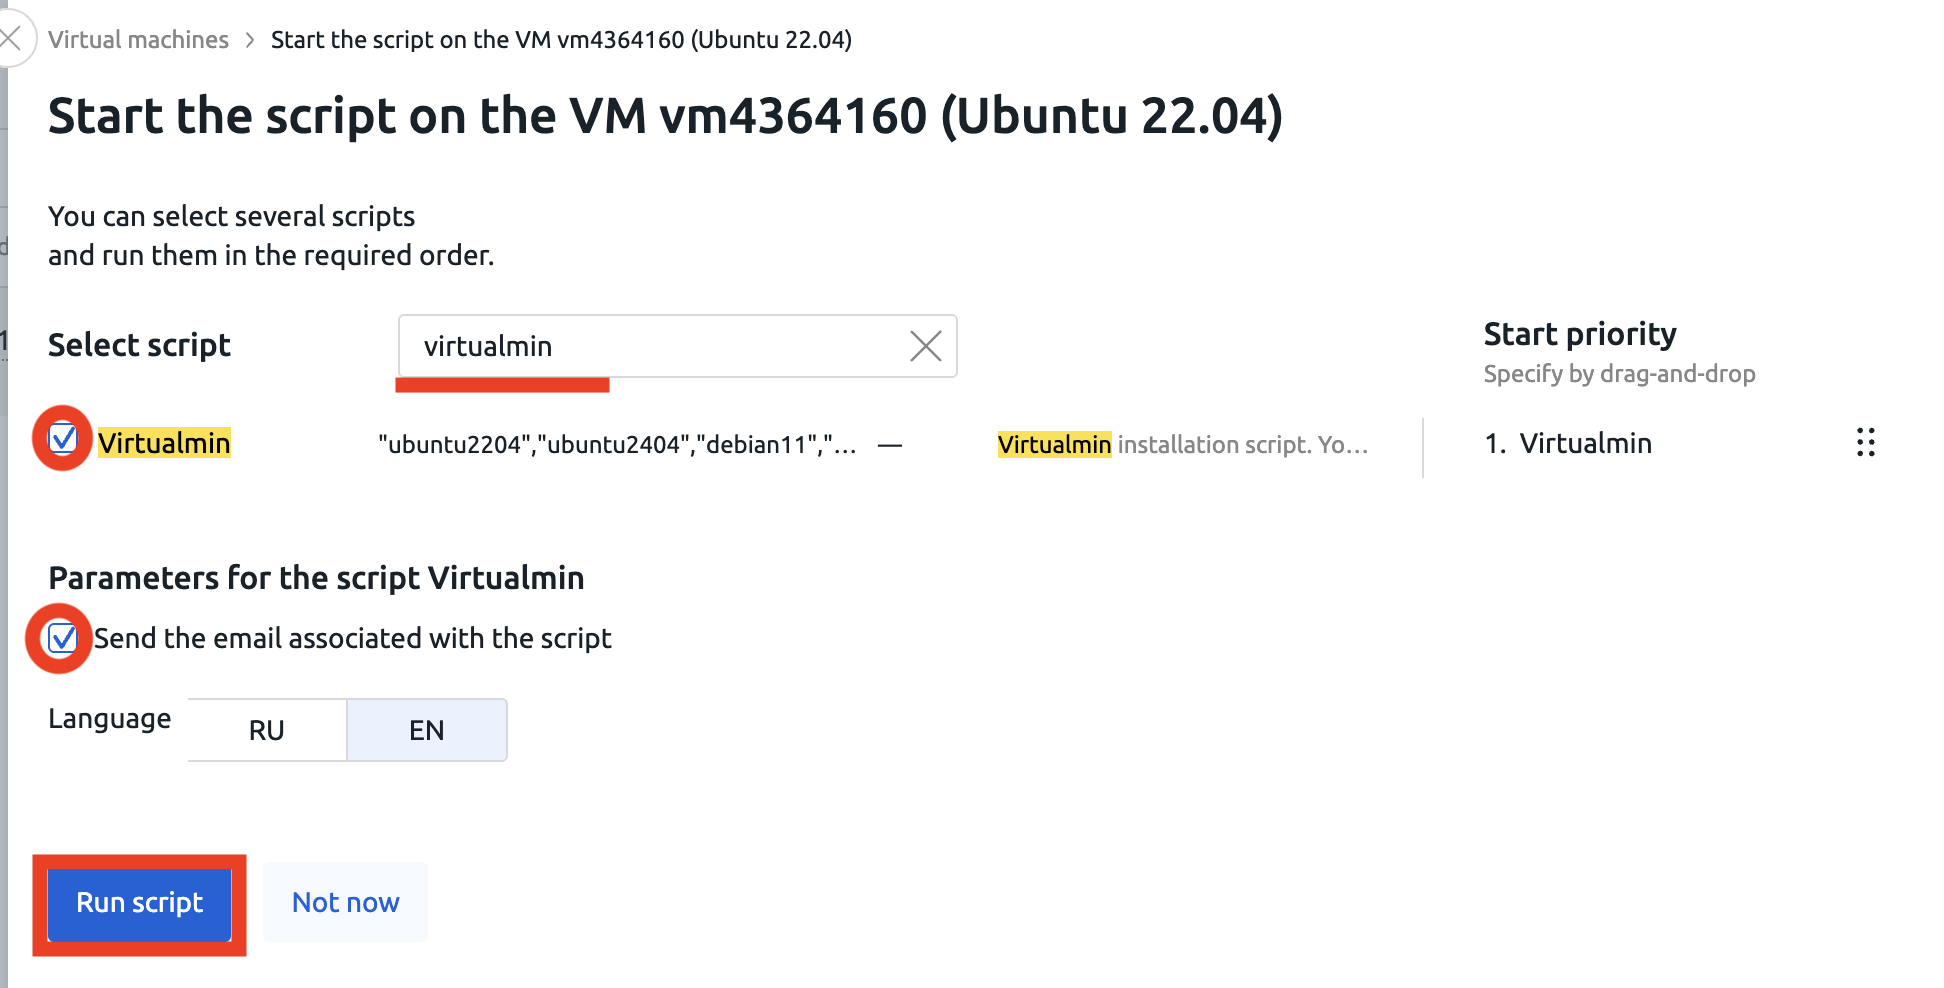
4. Make sure the list includes one of the supported OS options: debian11, debian12, ubuntu2204, ubuntu2404.
5. Check the box next to the script and click Run script.
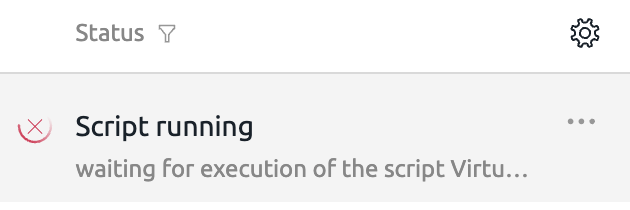
Step 3: Wait for the Installation to Finish
Once started, the status will change to Script running, meaning the installation process has begun. This usually takes about 5–10 minutes.
When the installation is complete, your VPS will return to Active status, and login credentials will be sent to the email address associated with your account.
Accessing Virtualmin
After installation, the panel will be available via HTTPS on port 10000: https://<server_IP_address>:10000
Example: https://45.140.xxx.xxx:10000
Your login and password will be sent to the email used for account registration.
After Installation
If you plan to install other software via auto-installation scripts, reinstall the OS first — scripts work only on a clean system. You can do this via the Reinstall OS option in VMmanager.
Your Virtualmin panel is now ready, and you can immediately start setting up websites, domains, mail, and databases.