


15.11.2024
16:29
Description
Spheron is a decentralized cloud platform that gives users the ability to store data and host projects in a peer-to-peer network. The peculiarity of the platform lies in its simplicity and accessibility for anyone who wants to participate in the testnet and get rewarded for their resources.
Spheron Testnet is something between node and mining. You connect your wallet, interact with the testnet, install the node on Ubuntu and start earning $FN points.
Minimum requirements
CPU: 4
RAM: 8 Gb
SSD: 100 Gb
OS: Ubuntu 22.04
Preparing for installation
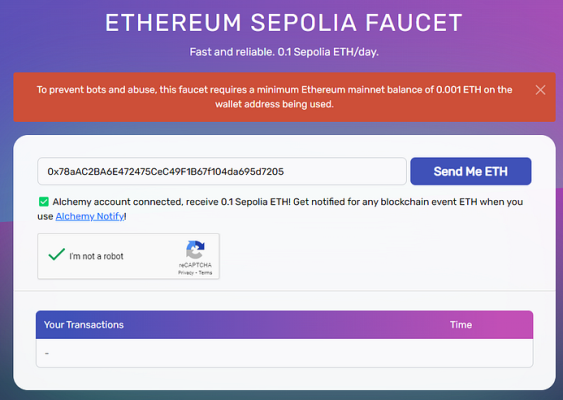
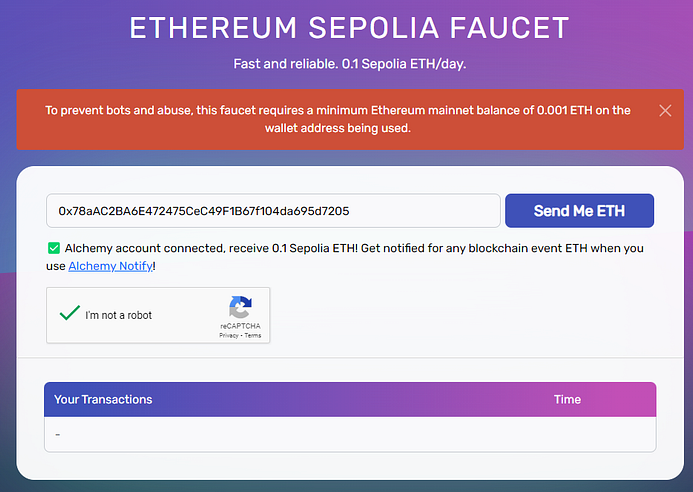
Need $ETH on the Ethereum Sepolia test network:
-
- Go to the faucet and request $ETH test tokens on the Arbitrum Sepolia network
- Create a new EVM wallet (empty), send test $ETH tokens there on the Arbitrum Sepolia network.
VERY IMPORTANT ! In nodes, softs, testnets, where private key is asked, be sure to use only those wallets, where there are no funds in the main networks! - Go to bridge and transfer $ETH from Arbitrum network to Spheron Testnet.
Bridging in cryptocurrency is the process of enabling the transfer of digital assets or data between different blockchain networks.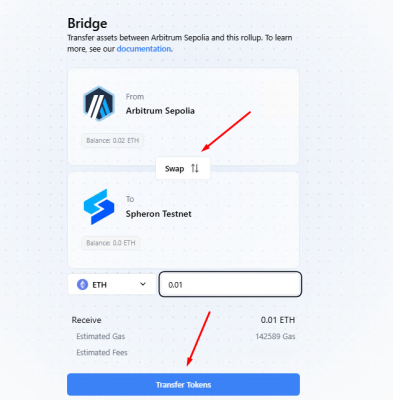
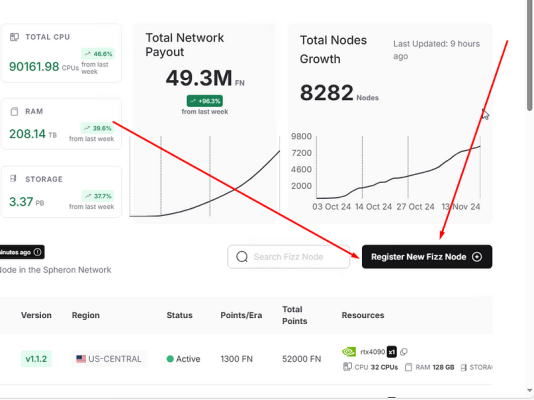
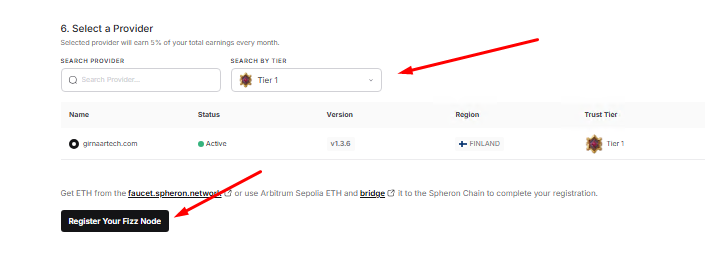
- Go to the website and connect your EVM wallet (new, with $ETH on the Spheron Testnet network).
- Click on"Register New Fizz Node."
 If you are installing the node on a VPS:
- Select OS: Linux.
- Below: CPU Node.
- Enter the specifications of your VPS.
- Select the region of your VPS.
- Check all checkboxes.
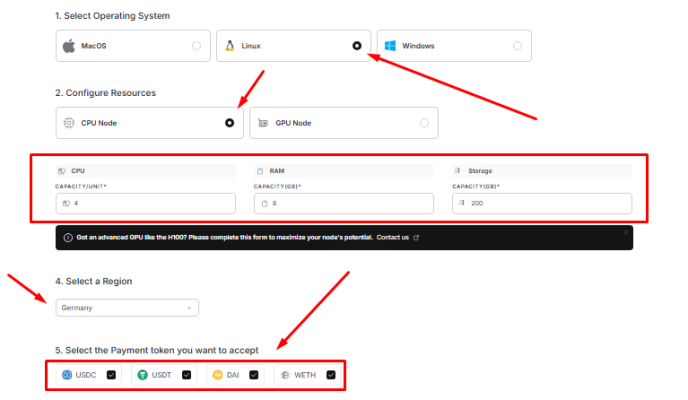
- Select "Tier 1", click "Register Your Fizz Node" at the bottom.
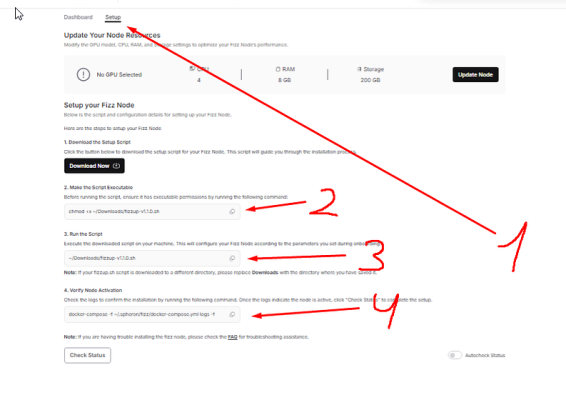
Attention! We recommend installing the script on a separate VPS with Windows OS, so that you don't have to download it on your main PC! - Click on "Download Now".

Installing the node
Install MobaXterm.
- Go to the faucet and request $ETH test tokens on the Arbitrum Sepolia network


- Connect to the rented server via root.
- In Mobexterm - click on the up arrow.
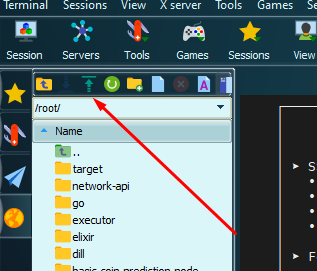
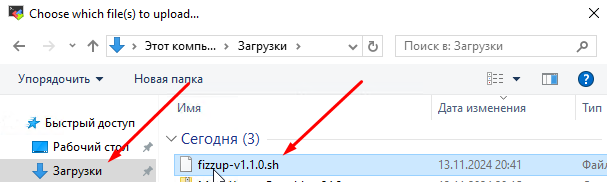
- Add the sh file you downloaded earlier.
- Execute the commands in the list:
sudo apt update && sudo apt upgrade -y for pkg in docker.io docker-doc docker-compose podman-docker containerd runc; do sudo apt-get remove $pkg; done sudo apt-get update sudo apt-get install ca-certificates curl gnupg sudo install -m 0755 -d /etc/apt/keyrings curl -fsSL https://download.docker.com/linux/ubuntu/gpg | sudo gpg --dearmor -o /etc/apt/keyrings/docker.gpg sudo chmod a+r /etc/apt/keyrings/docker.gpg echo "deb [arch="$(dpkg --print-architecture)" signed-by=/etc/apt/keyrings/docker.gpg] https://download.docker.com/linux/ubuntu "$(. /etc/os-release && echo "$VERSION_CODENAME")" stable" | sudo tee /etc/apt/sources.list.d/docker.list > /dev/null sudo apt update -y && sudo apt upgrade -y sudo apt-get install docker-ce docker-ce-cli containerd.io docker-buildx-plugin docker-compose-plugin sudo chmod +x /usr/local/bin/docker-compose - Go back to the site and click on "Setup".
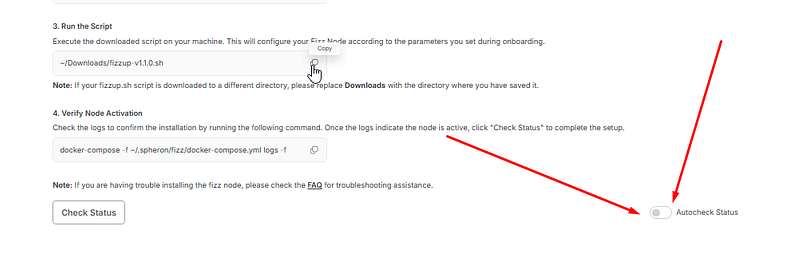
- You will have 3 commands at the bottom, copy them and paste them, one by one.
- When you enter the second command, the logs will appear (If they are green, then everything is going according to plan).
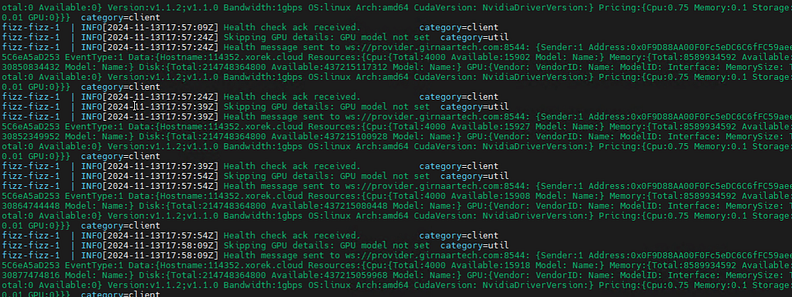
- Check the logs:
docker-compose -f ~/.spheron/fizz/docker-compose.yml logs -f - Go back to the site, click on the "Autocheck Status" slider at the bottom.
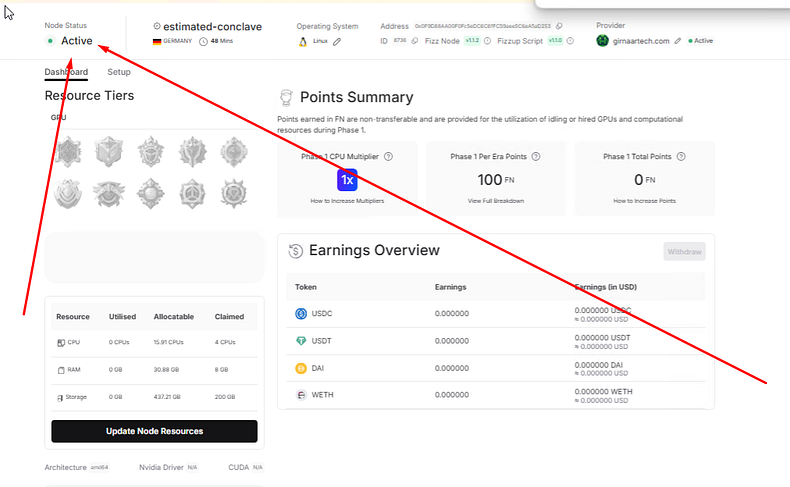
- You will be redirected to the dashboard, check the status, if the status is "Active" - everything is ready.

15% OFF White & Black Pearl
Order a new dedicated server in the U.S. and the Netherlands
Other articles
15.11.2024
6 814
Knowledge base / Information
15.11.2024
6 260
Knowledge base / Server