


cPanel is one of the most widely used commercial hosting control panels. It offers a full suite of tools for managing domains, websites, emails, databases, backups, and more — all through a structured web interface. With VMmanager, installation is fully automated and requires only a few steps.
Supported operating systems: AlmaLinux 8, AlmaLinux 9, Ubuntu 22.04
In this example, we are using Ubuntu 22.04.
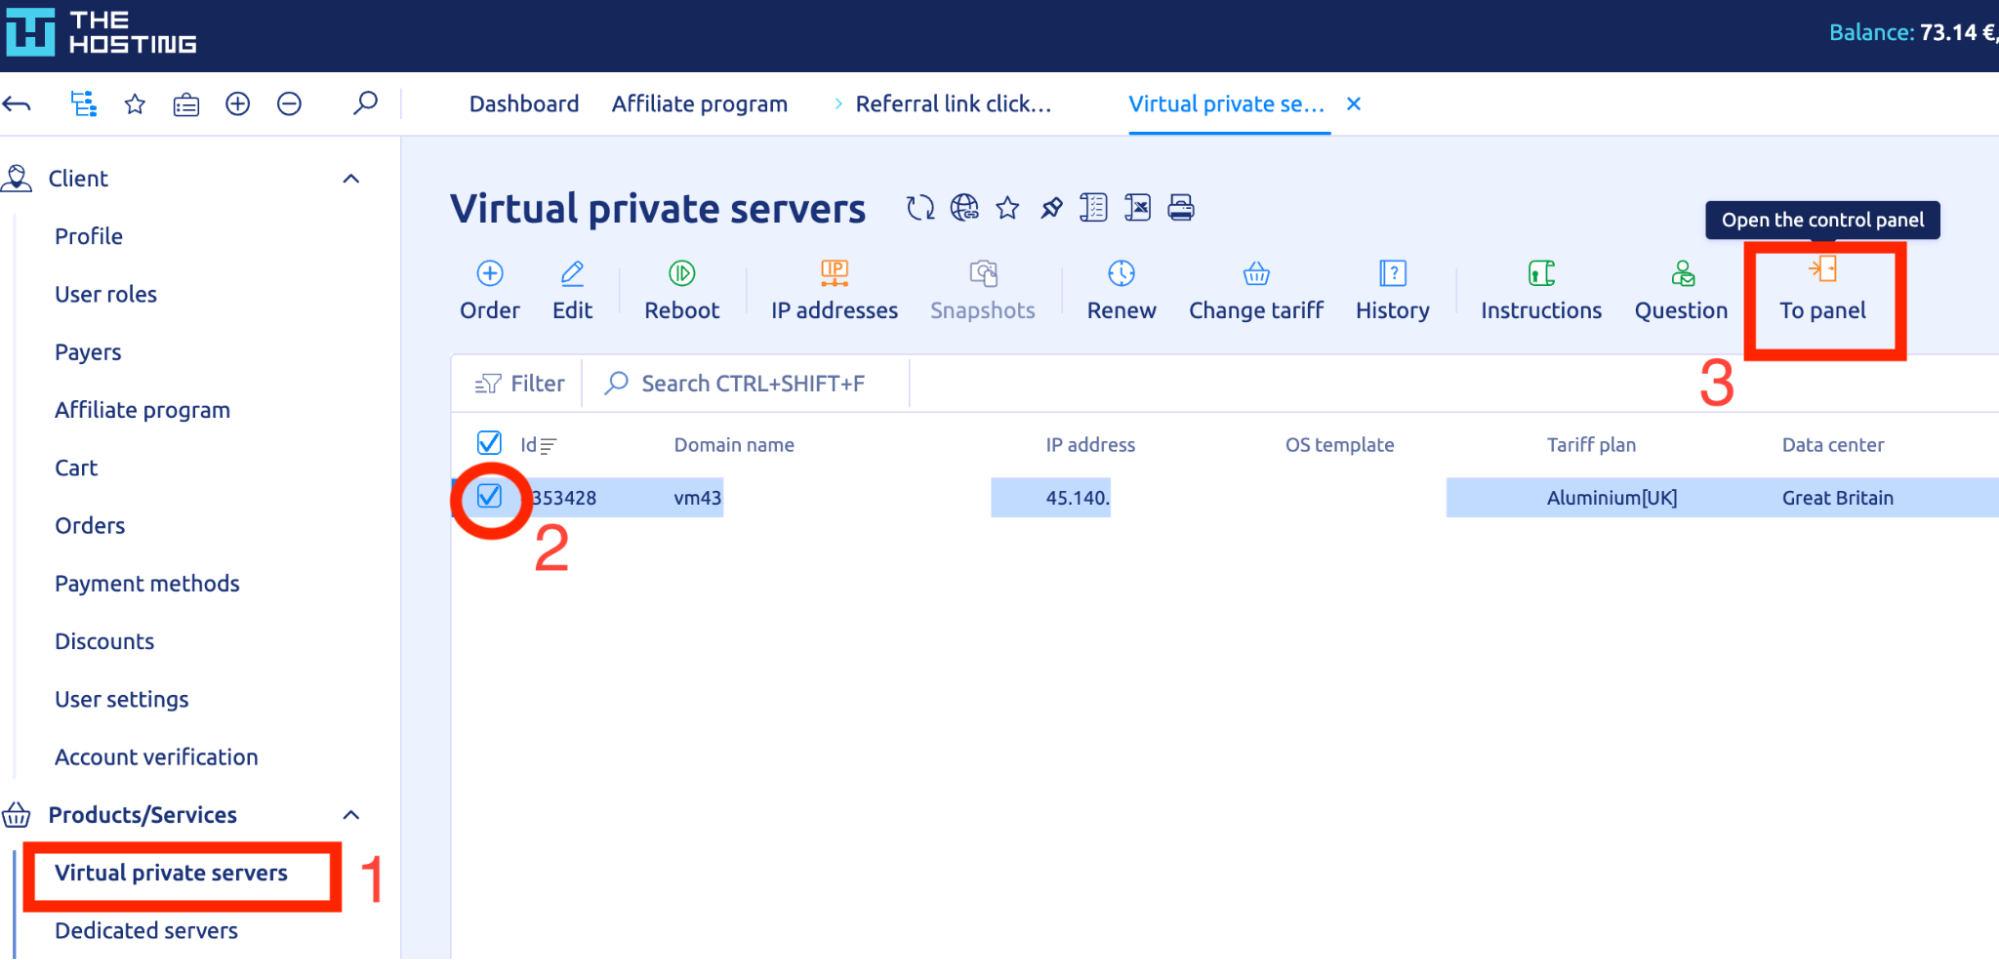
Step 1: Open the VM control panel
- Log in to the billing at THE.Hosting
- Go to the Virtual private servers section
- Select the server where you want to install cPanel
- Click To panel to open the server in VMmanage
Step 2: Start the cPanel installation script
1. In VMmanager, click the three dots next to the VM
2. Choose Run script from the dropdown
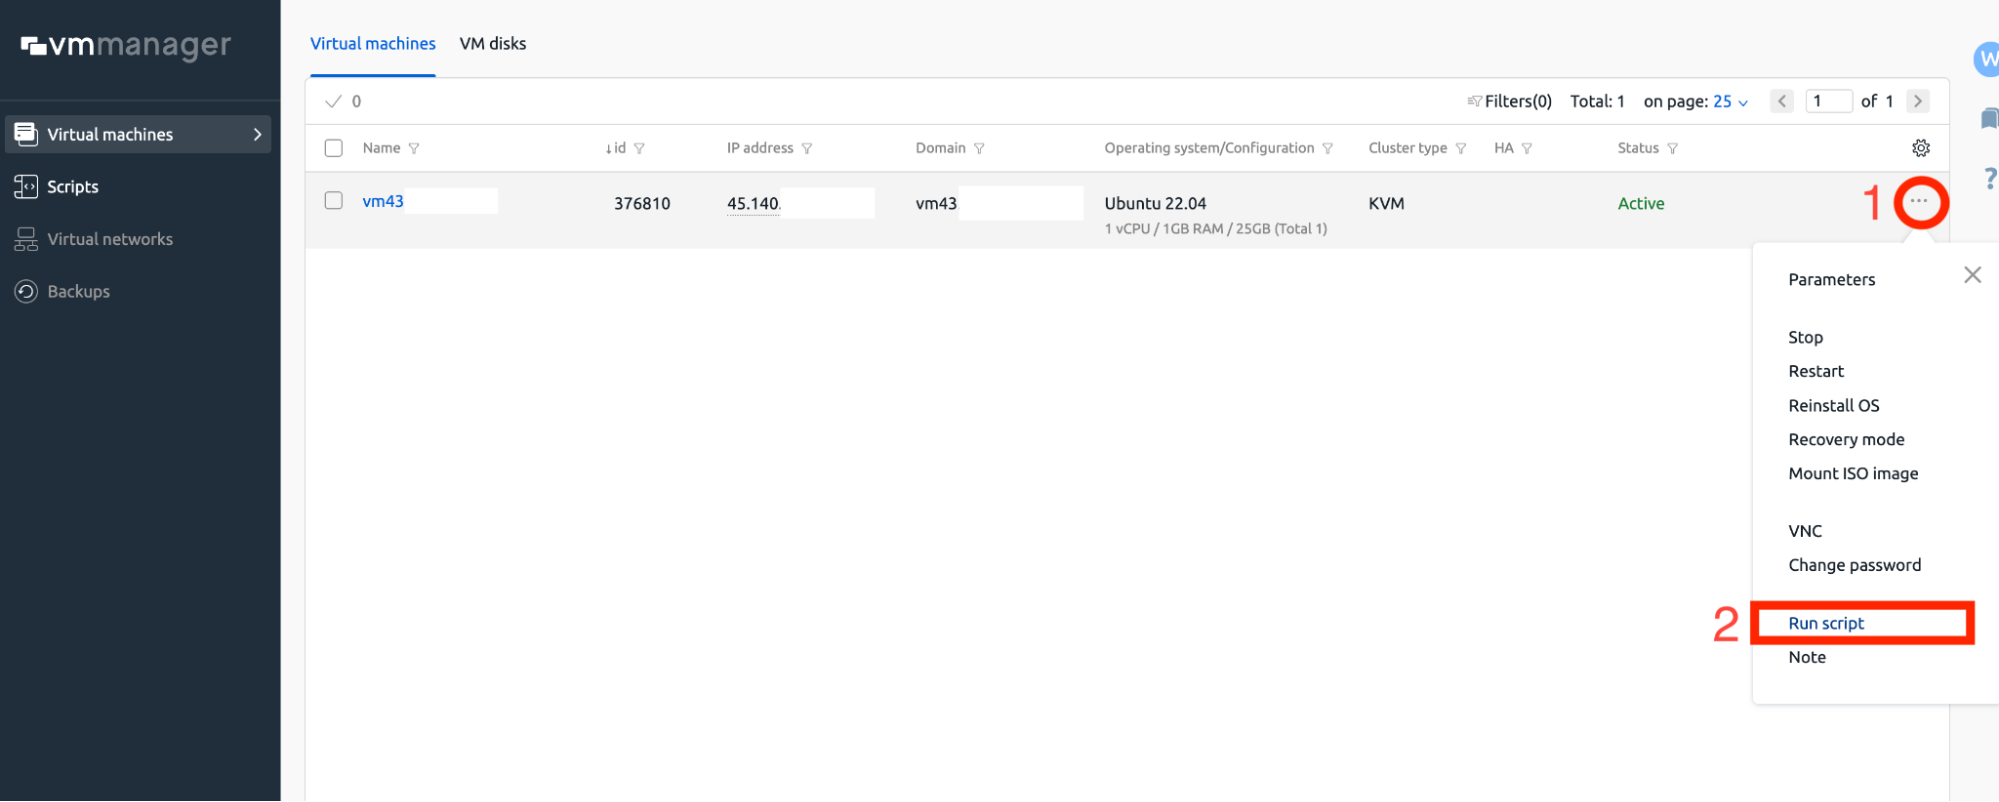
3. Type cpanel in the search field
4. Select the cPanel script from the list
Confirm that the supported OS list includes: alma8, alma9, ubuntu2204
5. Make sure to tick Send the email associated with the script — this will send the login credentials to your email
6. Click Run script to start the installation

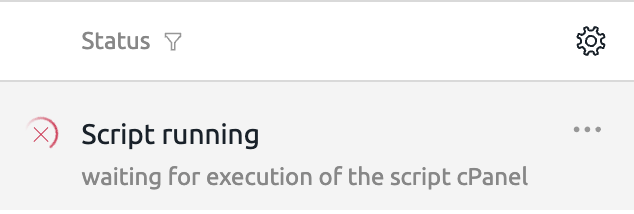
Step 3: Wait for installation to complete
Once the script is running, the status will show Script running. The installation process usually takes 10–15 minutes depending on server performance and selected OS.
Accessing cPanel
After the installation is complete, you can access the cPanel interface at: https://<your_server_ip>:2087
Example: https://45.140.xxx.xxx:2087
Your login and password will be sent to the email address linked to your account.
Installing other software?
If you plan to install something else later, you must reinstall the operating system first. All installation scripts require a clean OS. You can do this directly in VMmanager using the Reinstall OS option.
cPanel is now installed and ready to use. You can begin managing your websites, emails, databases, and hosting environment through a robust and user-friendly interface.