


Description
The Farcaster node is similar in installation to the Taiko node. It requires Alchemy's RPC, and interestingly enough, you can link your Warpcast FID account to it. This means that now you can not only develop your Warpcast social network profile, but also link it to the node.
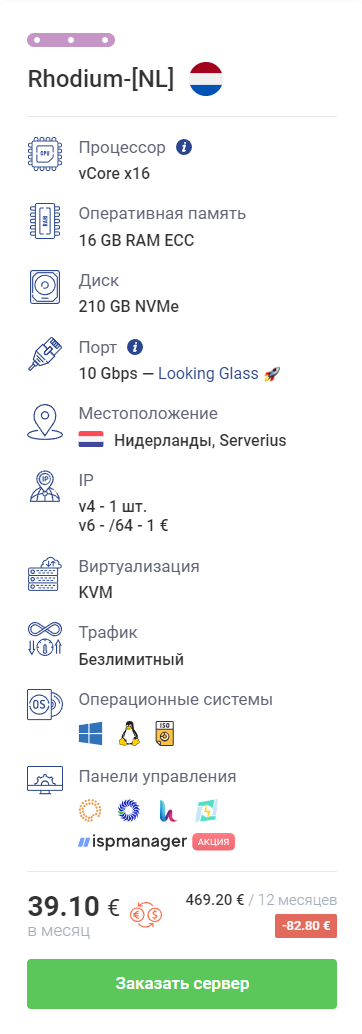
Requirements
CPU: 4
RAM: 16
SSD: 200GB
OS: Ubuntu 20.04
Installation
We have prepared for you a detailed guide on how to install noda. The installation process is as simple as possible, and we recommend choosing a server with minimum requirements as stated in the recommendations to avoid possible synchronization issues.
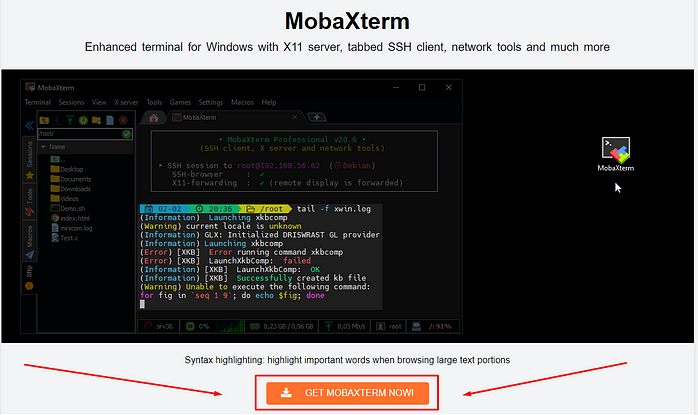
- Install MobaXterm.

- Connect to the rented server via root.
- Execute the commands in the list.
- Update and install the necessary packages.
sudo apt update -y
sudo apt install screen -y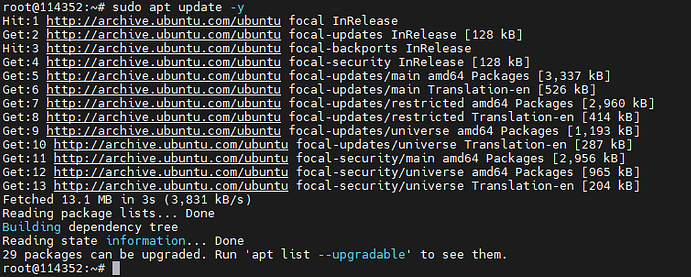
2. Log in to Alchemy and register an account.
- Click on "Overview".
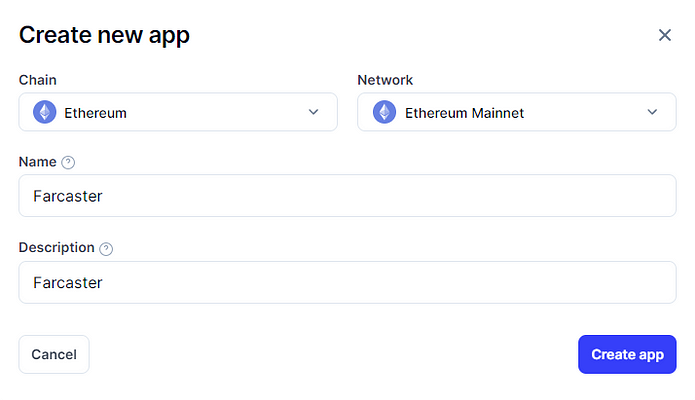
- Click on "Create new app".
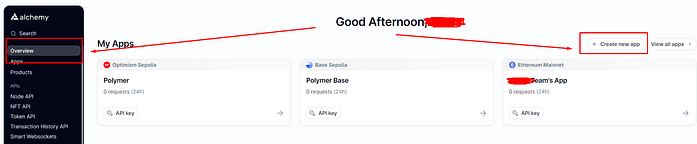
- Choose "Ethereum" and "Ethereum Mainnet."
- On the bottom, any value and click on "Create App".
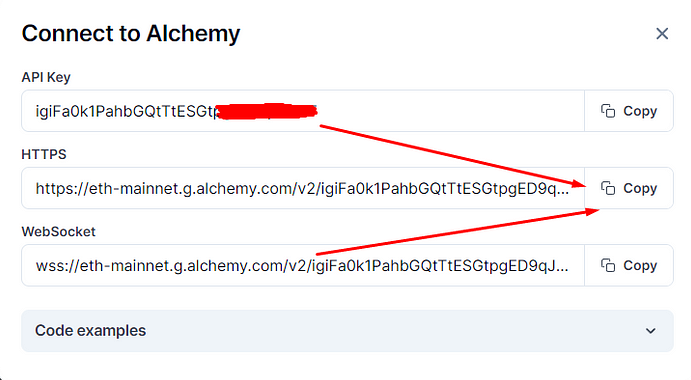
- On the right side, click on "Api Key".

- Copy the HTTPS address and save it in Notepad or any other convenient place.
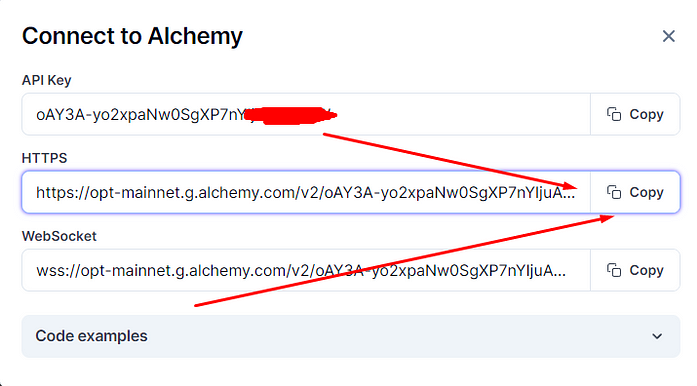
- Repeat the same steps, but select "Optimism Mainnet".
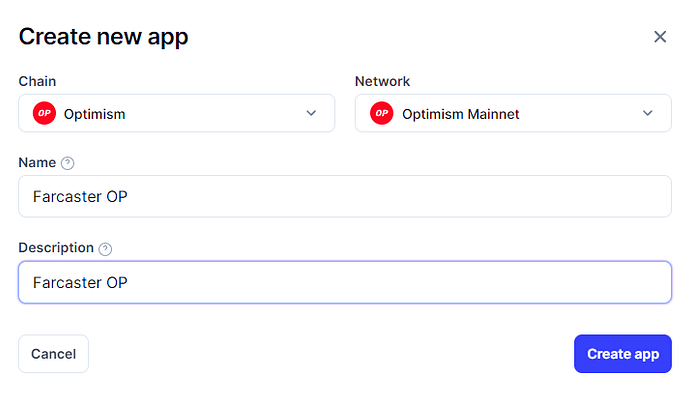
- Save the HTTPS address.
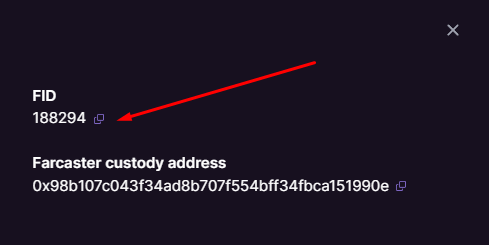
- Next we go to our Warpcast profile, we need to copy our FID.
- Click on "Profile" - "Three dots" - "About".
- Copy the FID and save it to notepad or a safe place.
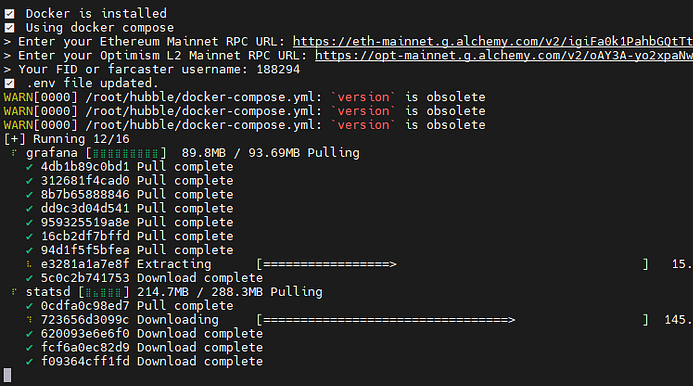
3. Go back to the terminal, install the script:
curl -sSL https://download.thehubble.xyz/bootstrap.sh | bash4. Next, enter our copied links one by one:
- First - Ethereum Mainnet.
- Second - Optimism Mainnet.
- Then insert our FID.
- The installation will start:
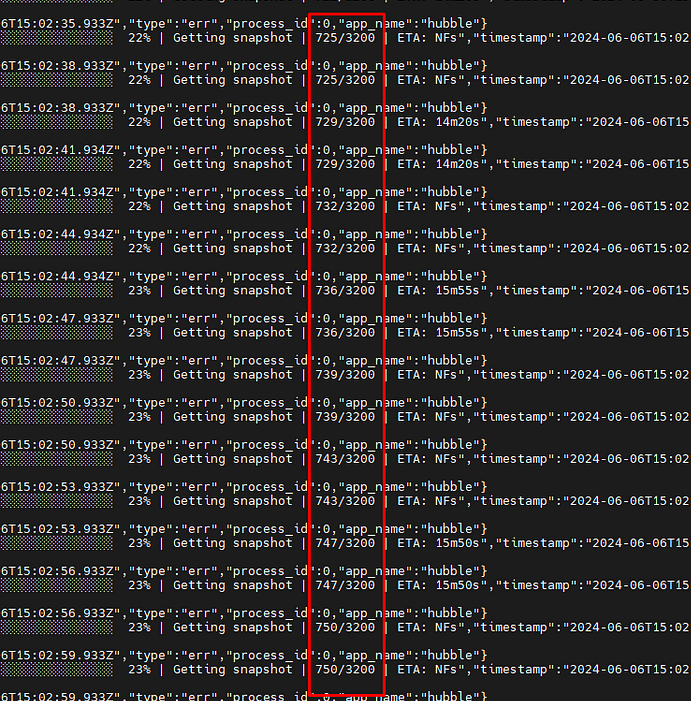
- After a couple minutes, logs will appear - so everything is fine!
- You can stop them by pressing CNTR+C (if you want to exit the logs).
- In the logs you will see snapshots - they will grow gradually.
- Synchronization will take about 2-3 hours.
5. Go to the dashboard at the link: http://Айпи_вашего_сервера:3000.
- Initially you will have No data and nothing will be visible.
- After a few hours, you will have graphs:
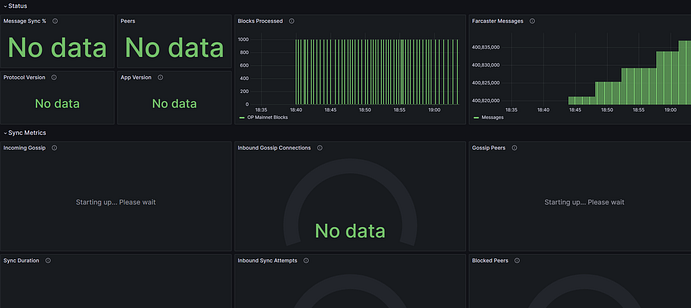
- How it should be after a few hours of waiting:
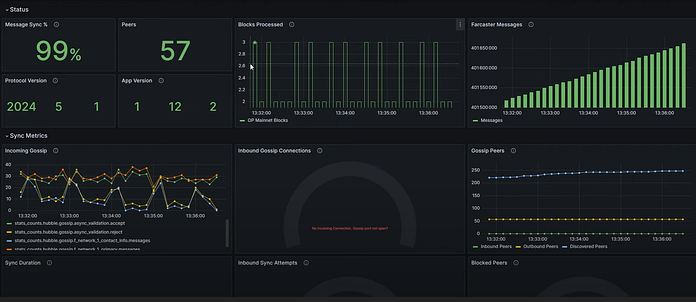
You can also monitor synchronization by logs.
Open Ports
It is required that port 2283 is open.
- Copy all commands one by one and paste them into the console:
sudo iptables -A INPUT -p tcp --dport 2281 -j ACCEPTsudo iptables -A INPUT -p tcp --dport 2282 -j ACCEPTsudo iptables -A INPUT -p tcp --dport 2283 -j ACCEPTsudo iptables-save > /etc/iptables/rules.v4sudo iptables -L -v -n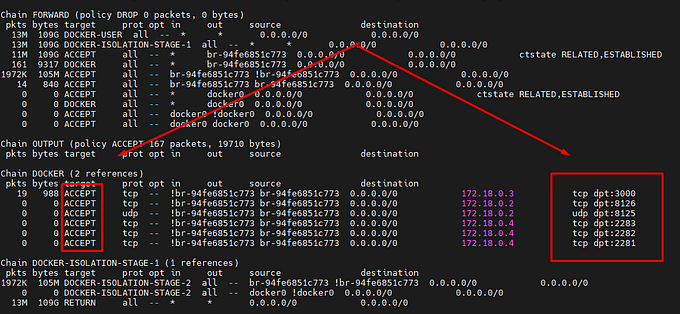
These steps will help you open ports 2281, 2282, and 2283 using iptables.
Use one of the following commands to save changes to iptables so that they persist after a reboot:
- Debian/Ubuntu:
 sudo apt-get install iptables-persistent
sudo netfilter-persistent save- CentOS/RHEL:
sudo service iptables save- For systems with systemd:
sudo iptables-save > /etc/iptables/rules.v4- To verify that the rules have been added:
sudo iptables -L -v -nThis will show the current iptables rules and allow you to verify that ports 2281, 2282, and 2283 are open.
Additional commands
Command to update:
cd ~/hubble && ./hubble.sh upgradeView logs:
docker logs hubble-hubble-1 --since 1m -fDelete node:
rm -rf hubble && docker stop farcasterxyz/hubble:latest && docker rm farcasterxyz/hubble:latest && docker stop grafana/grafana:10.0.3 && docker rm grafana/grafana:10.0.3 && docker stop graphiteapp/graphite-statsd:1.1.10-5 && docker rm graphiteapp/graphite-statsd:1.1.10-5