


RIPENCC Access is an access management system provided by the Regional Internet Registry for RIPE NCC members. Through RIPE NCC Access, members can manage their contact details, register IP addresses and offline systems, and receive information about their membership and the services provided by RIPE NCC. RIPE NCC Access also allows members to participate in a variety of processes and discussions related to the management of Internet resources.
What is a RIPE NCC Access object?
An object in RIPE NCC Access is a record that contains information about a specific resource or entity, such as an IP address, autonomous system, or contact person. In RIPE NCC Access, objects are used to represent and manage various items related to Internet resources and membership in RIPE NCC. For example, an object may contain information about a registered IP address, including its owner, location, and other attributes.
RIPE NCC members can create, modify and manage objects through the RIPE NCC Access system, allowing them to efficiently manage their Internet resources and update their membership information. Each object has a unique identifier(object ID) that allows it to be uniquely identified in the system. All objects in RIPE NCC Access are stored in the RIPE Database, which is the central registry of information about Internet resources in the RIPE NCC region.
In order to regulate activity, your security and ours, when renting a subnet we ask you to create an object that will be specified with the subnet when it is rented.
How do I create a facility?
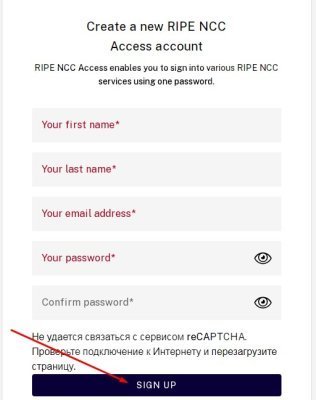
To get started, go to https://access.ripe.net/registration.
Fill in your details and then click Sign in. An e-mail with a link to confirm registration will be sent to the specified e-mail address. You need to click on it, then you will be able to authorize on the site.
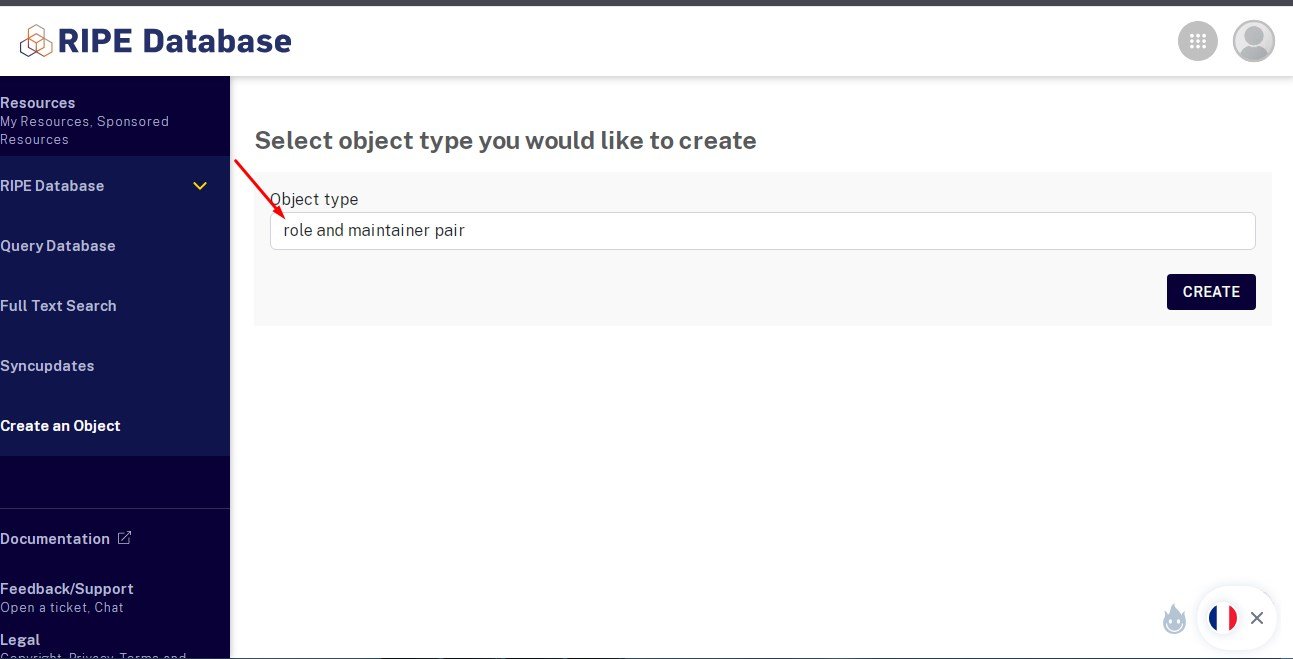
Next, go to the object tab https://apps.db.ripe.net/db-web-ui/webupdates/select.
In the object type field it should be role and maintainer pair. Click the Create button.
Now fill in the data
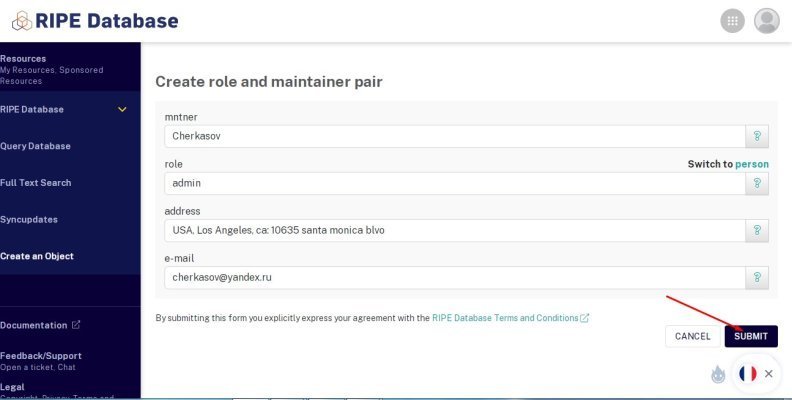
At the end click Submit.
After that send us a link to the object that should be specified when issuing the subnet.