


After connecting to the server via RDP, you may need to play sound. Setting up audio transmission from the server to your work computer and back is quite simple: you will be able to hear everything that happens on the server, and the server will receive audio from your microphone. This may be necessary for example in Skype or Zoom calls that you conduct from the server.
Playback of sound from the server
Playback is not as difficult as it may seem at first glance. There are six simple steps to follow:
- First of all, you need to connect to the server via RDP.
- Next, enable the Windows Audio service.
- Give permission to redirect audio/video and audio recording in the server properties.
- Update the registry settings.
- Install the Remote Desktop Session Host role.
- Configure the connection on the local computer.
Now let's consider each step separately.
Connecting to the server via RDP
It is very simple:
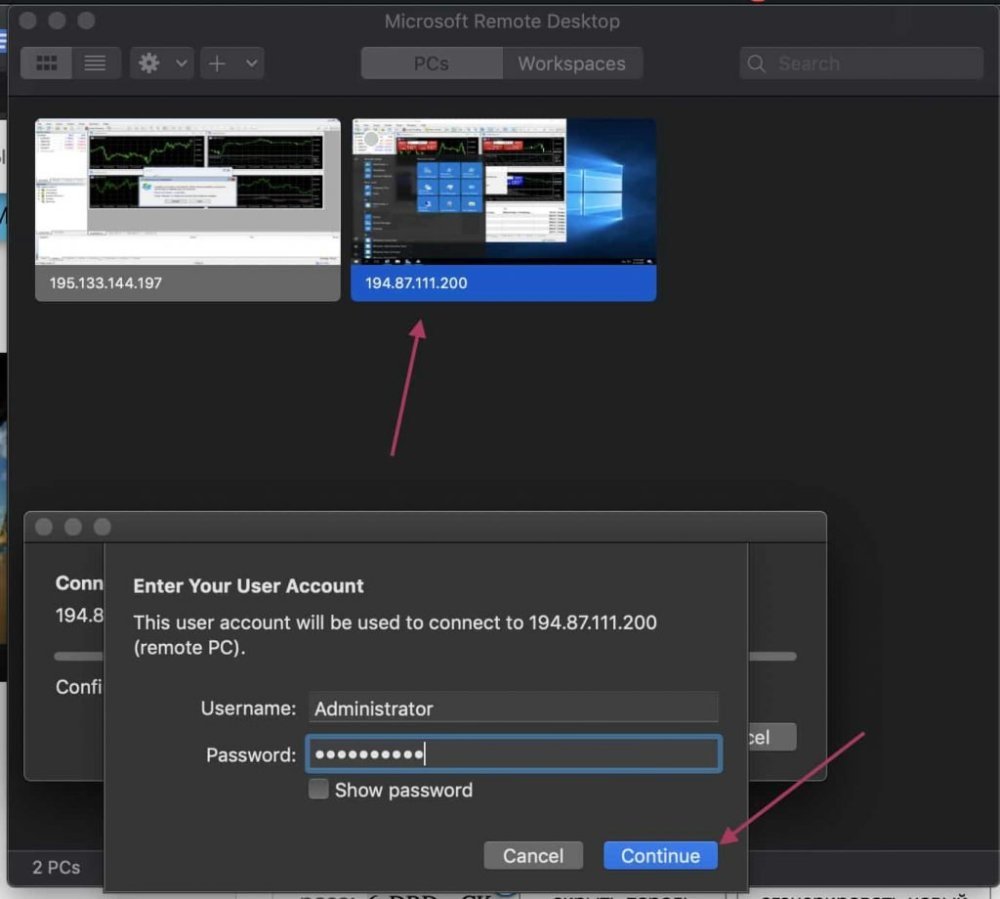
After the connection is established, enable the appropriate service.
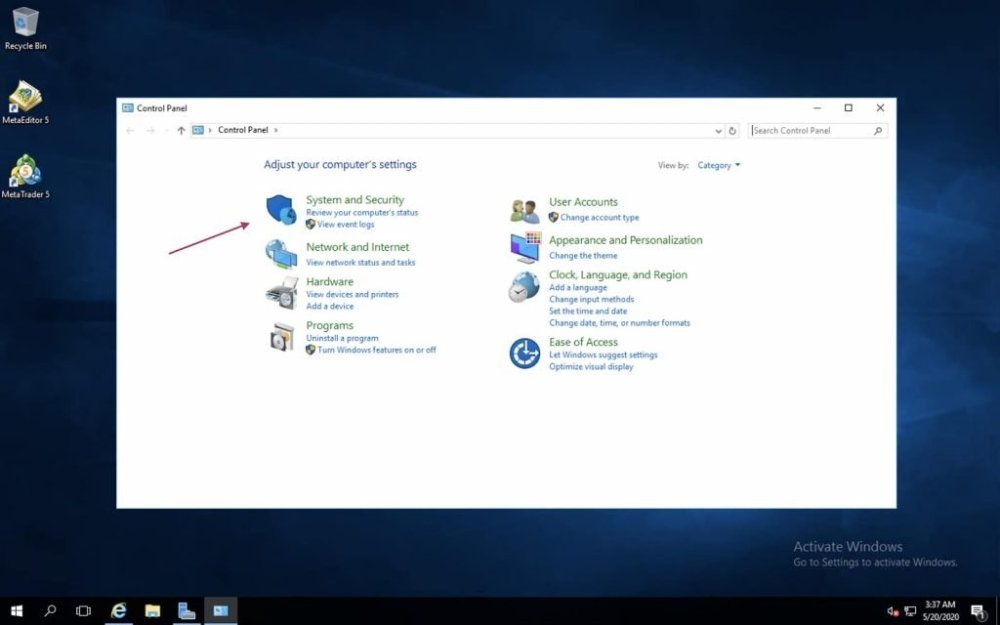
Enable the Windows Audio service
To do this, go to Control Panel and System and Security.
Then select "Administrative Tools" or "Administration".
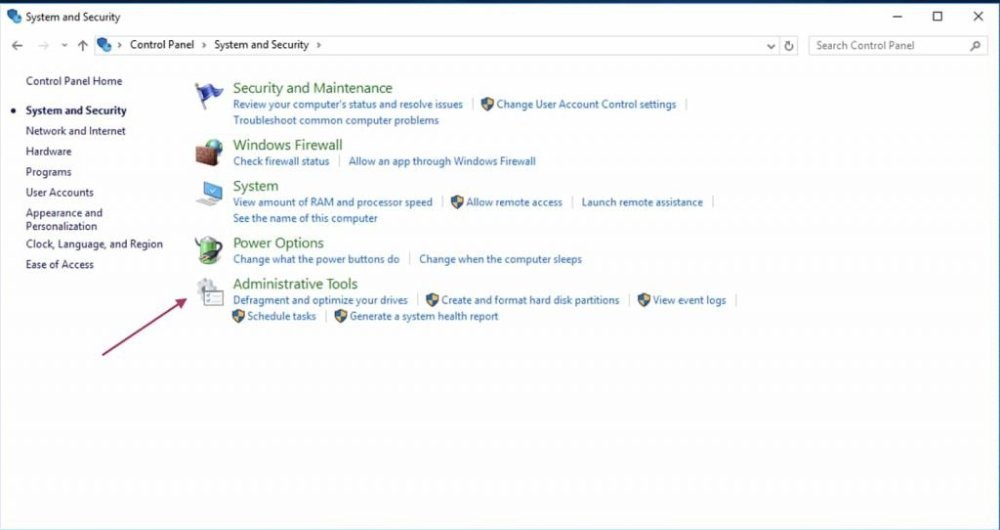
Launch the "Services" or "Services" program.

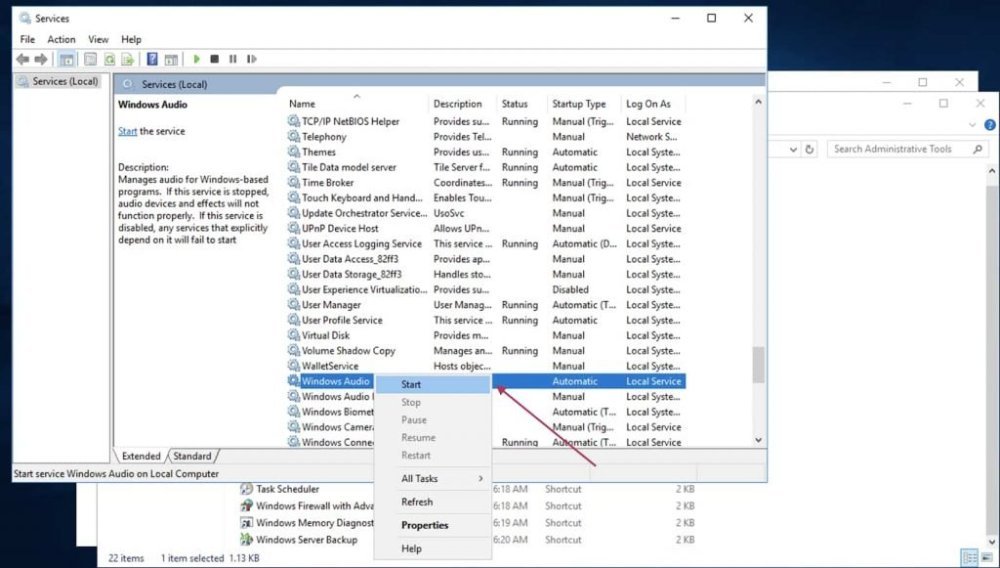
Find the "Windows Audio" icon, click the PCM and select Properties or Properties.
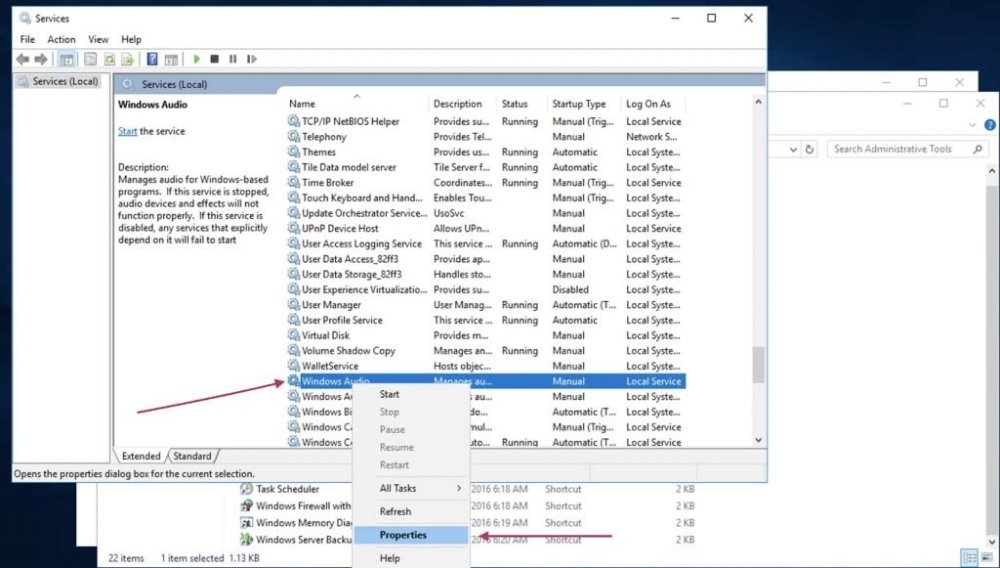
After that, the settings window will be launched. Next you need to set Startup Type and click OK. After the service responsible for sound, will start every time independently turned on after the startup of the system.
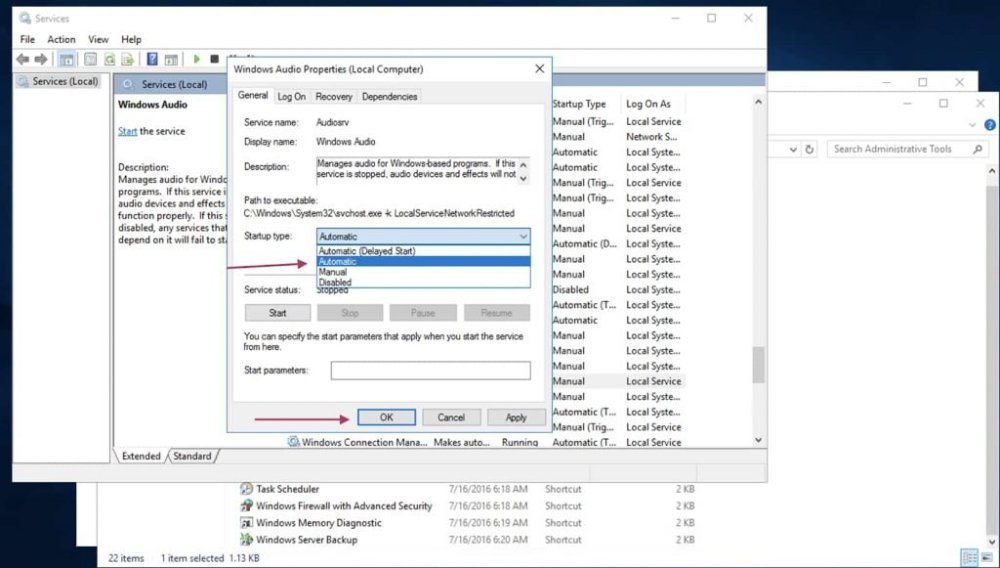
Next we start the service itself.
But that's not all. Let's go further on the settings.
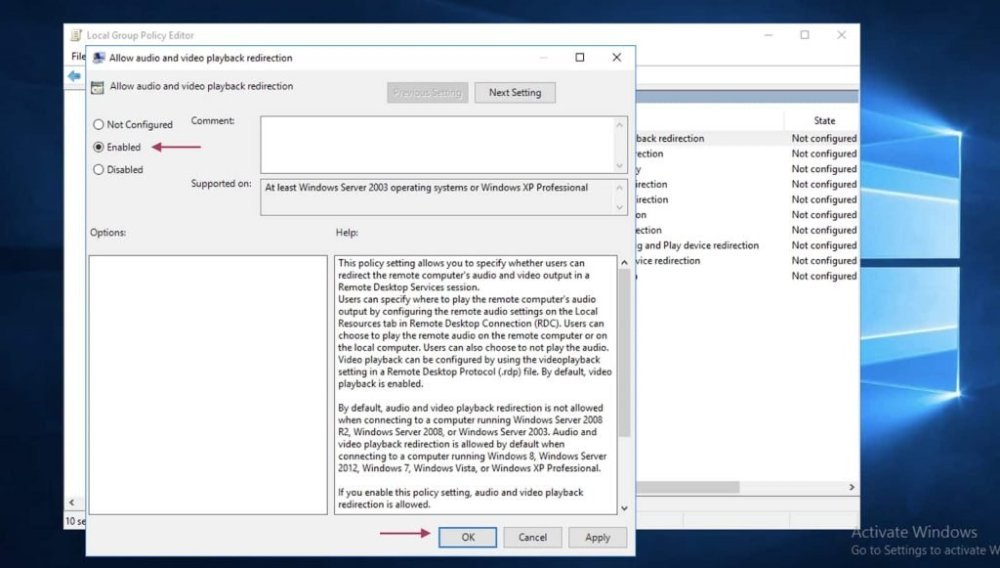
Allow audio/video redirection and audio recording
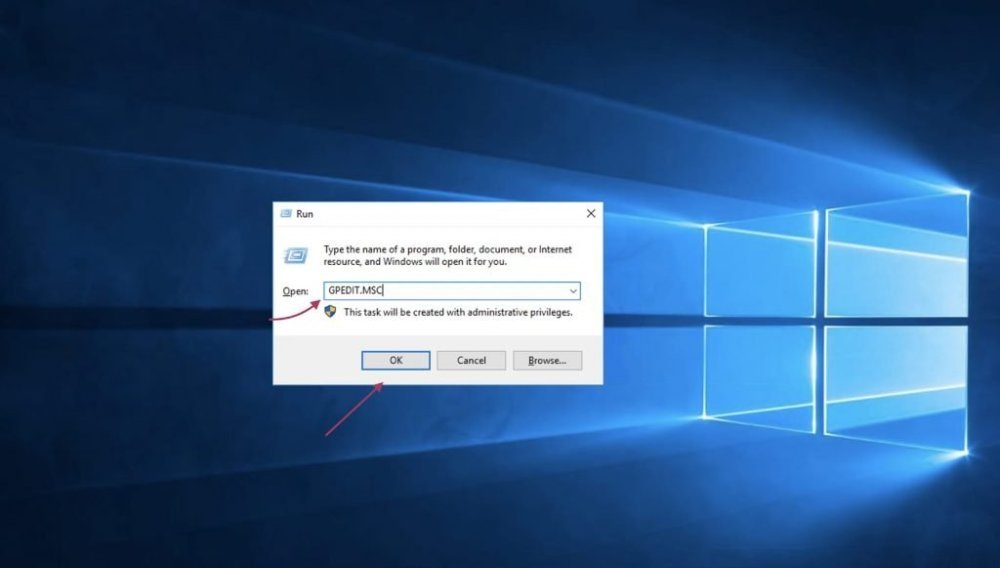
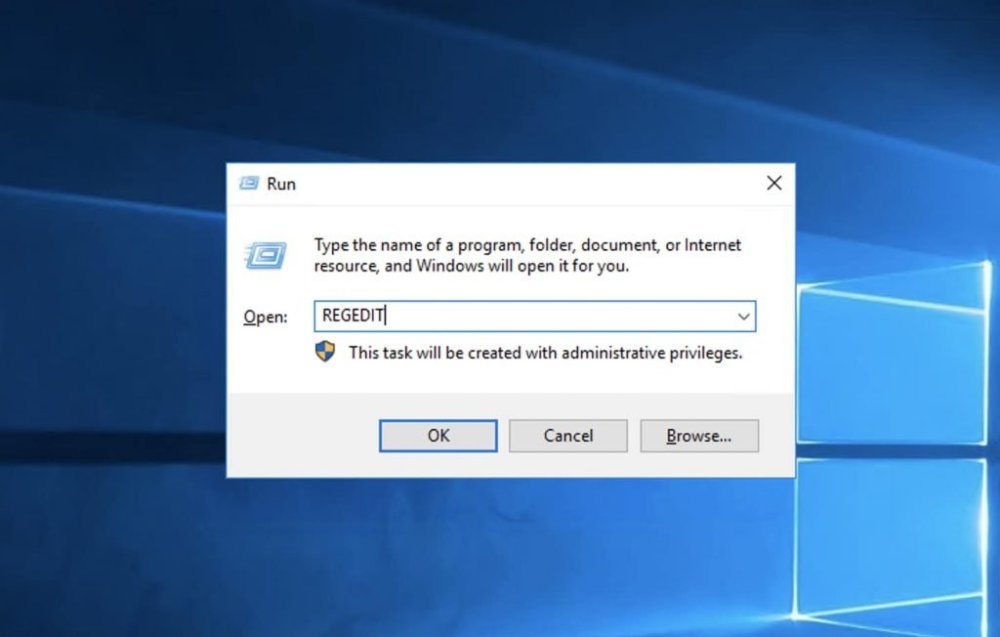
Press Win+R (on Windows) or CMD+R (on Mac), type GPEDIT.MSC in the new window and press OK or Enter.
A new window will open. Select - Computer Configuration - Administrative Templates - Windows Components, - Remote Desktop Services - Remote Desktop Session Node - Remote Desktop Session Node - Device and Resource Redirection - Allow redirection of audio and video playback.
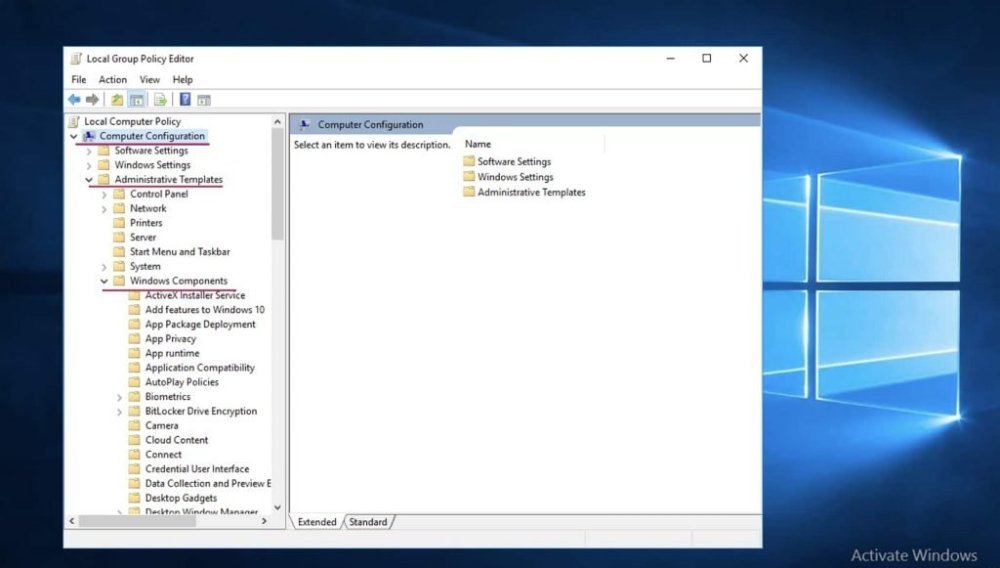

Then in Remote Desktop Services or Device and Resource Redirection find:
- Allow redirection of audio and video playback
- Allow redirection of audio recording
In the English version:
- Allow audio and video playback redirection
- Allow audio recording redirection
Open both and click Allow or Enabled.
Now you can update the registry settings.
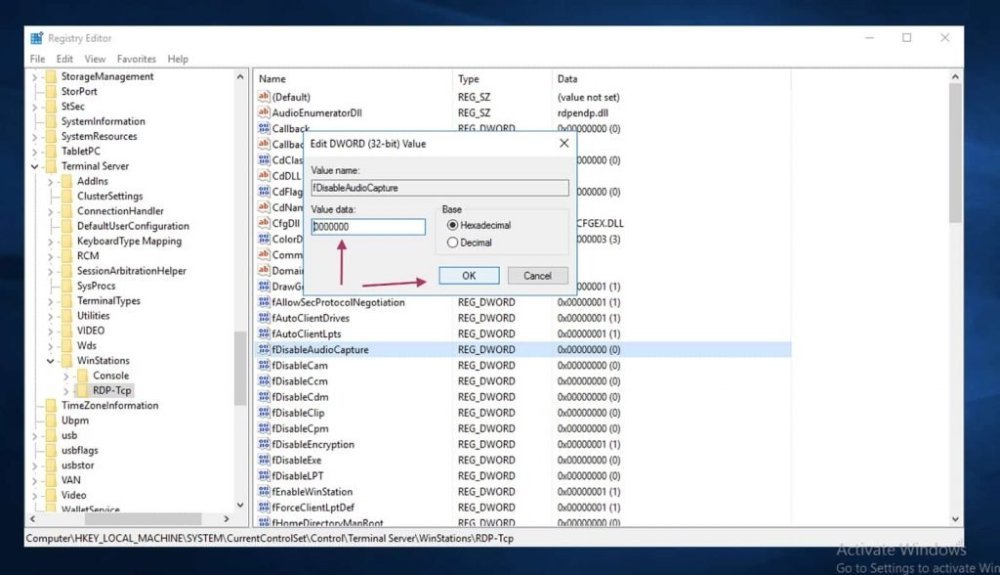
Updating the registry settings
Both policy rules have the state "Enabled". A new window will appear. Navigateto the path :
HKEY_LOCAL_MACHINESYSTEMCurrentControlSetControlTerminal ServerWinStationsRDP-Tcp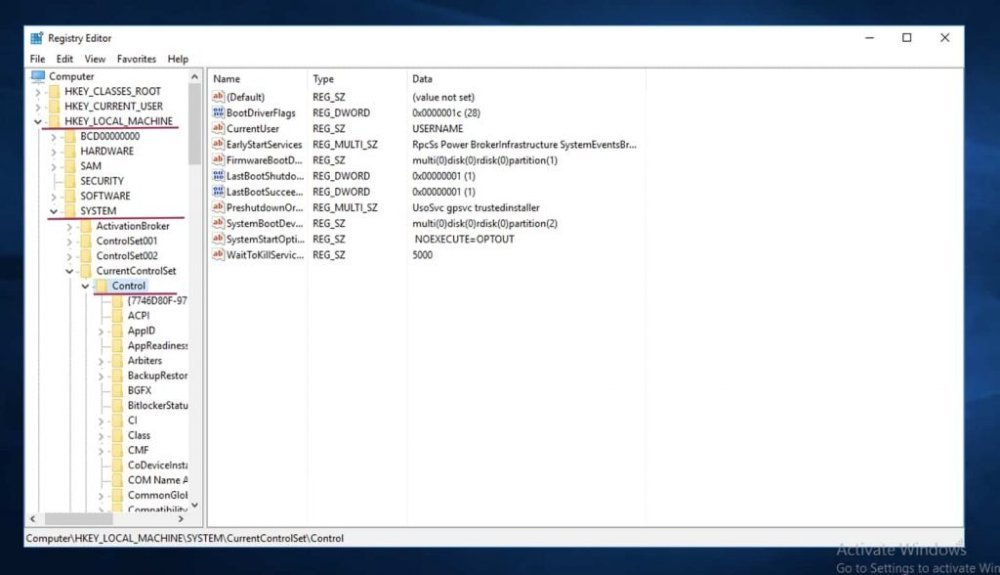
Now we need to find and open the following file:
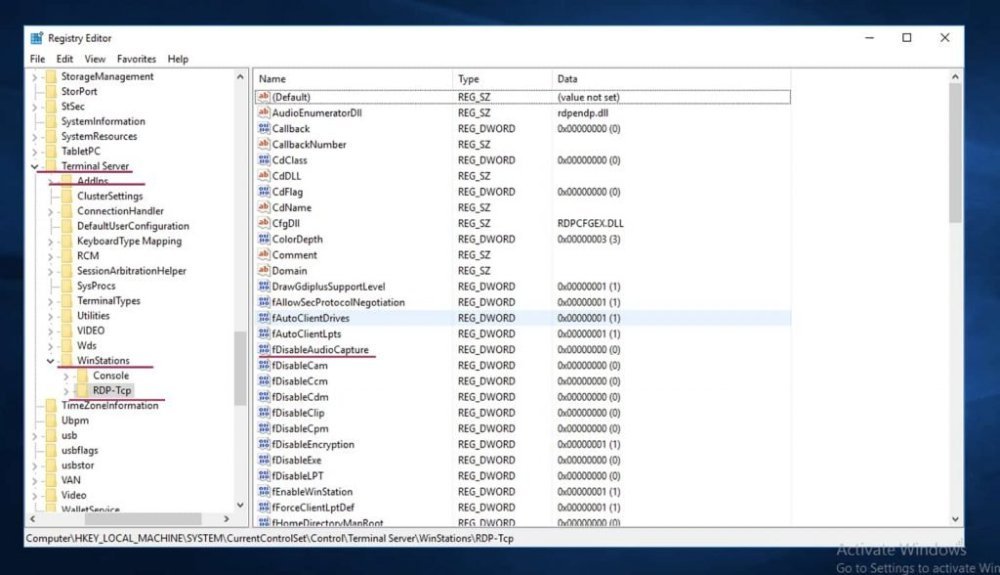
It remains to open this file and make some edits to it. In the small box, set "00000000" instead of 0 and click OK.
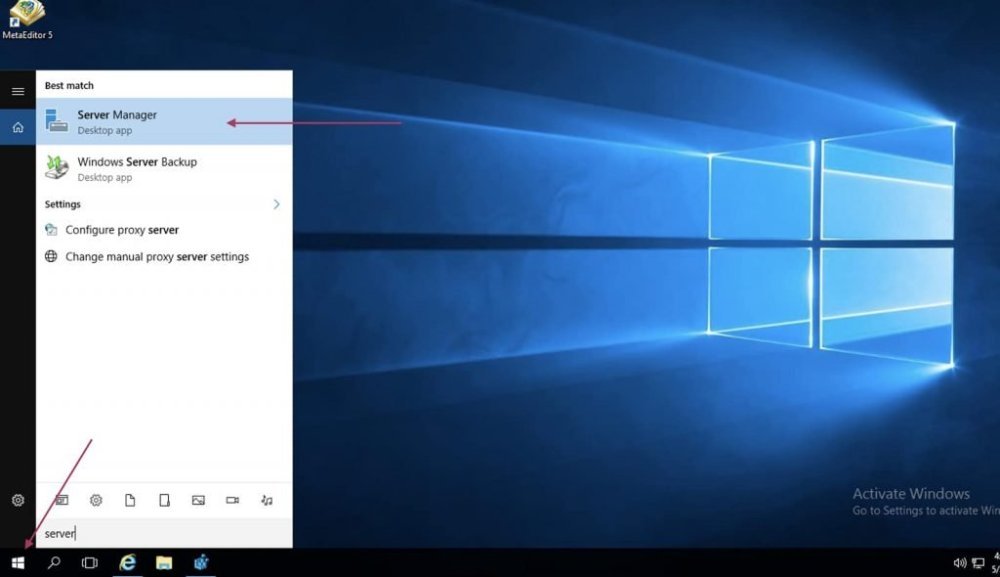
Install the REMOTE DESKTOP SESSION HOST roles.
Click Start, launch the Server Manager program or Server Manager.
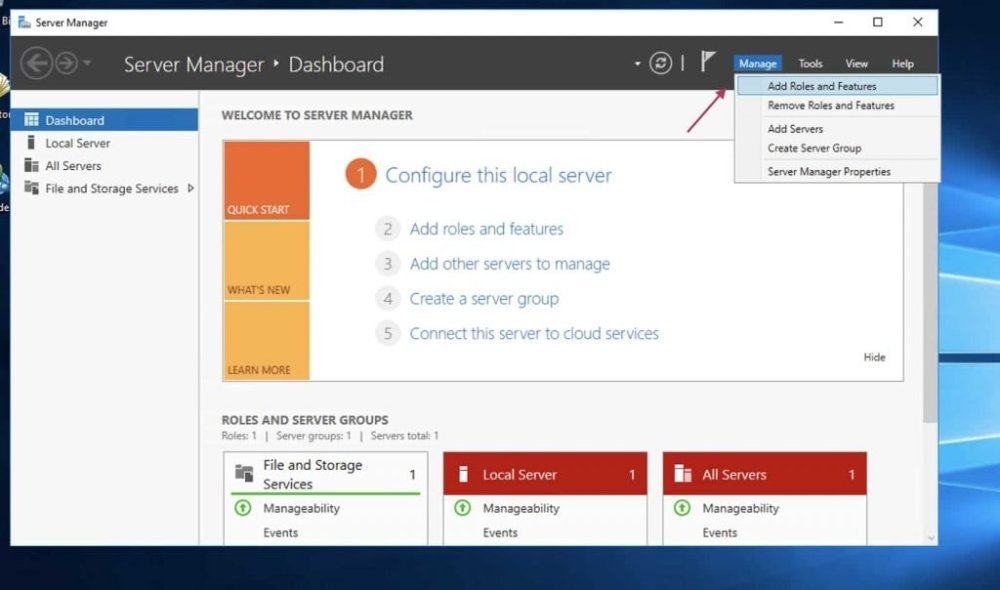
In the corner on the top right, select the menu item: Manage - Add Roles and Features or Manage - Add Roles and Features.
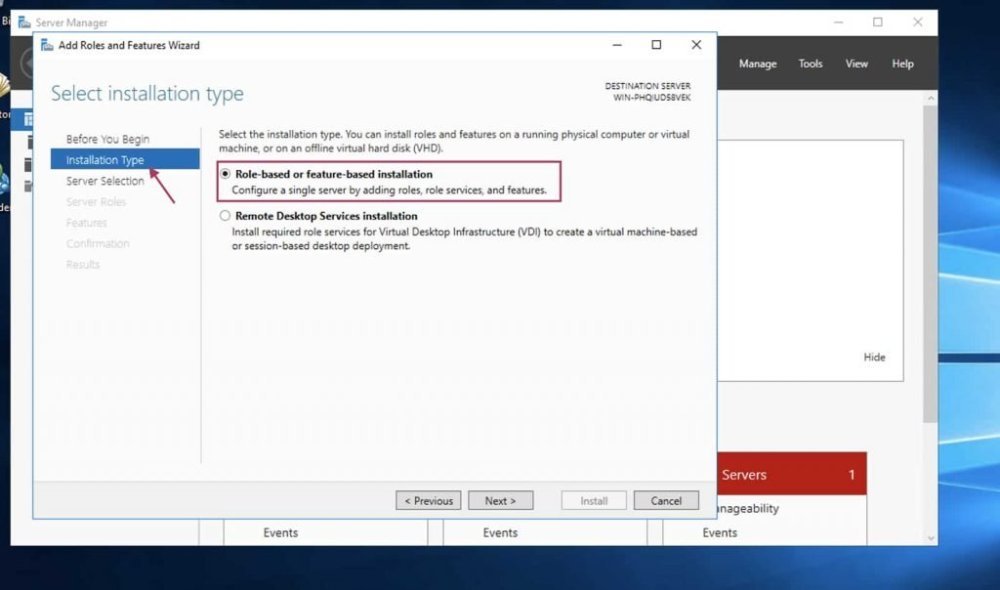
Next, select "Role-based or Feature-based installation" or "Role-based or Feature-based installation" and click Next or Next.
Select Server Selection, then check the "Remote Desktop Service "s checkbox and click Next.

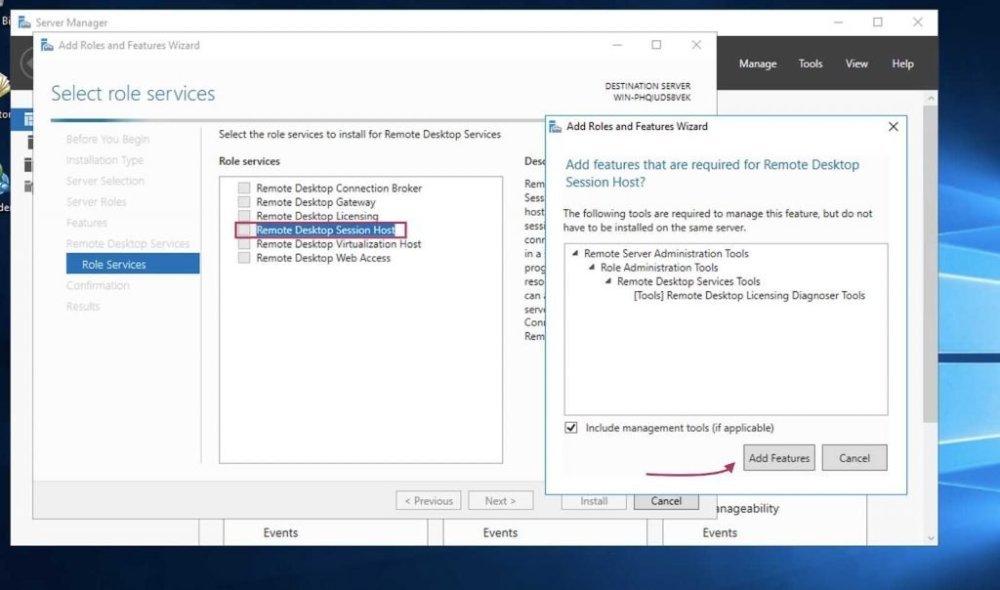
Then simply click Next. Finally, check the Remote Desktop Session Host checkbox and in the new window click "Add features" and click Next.
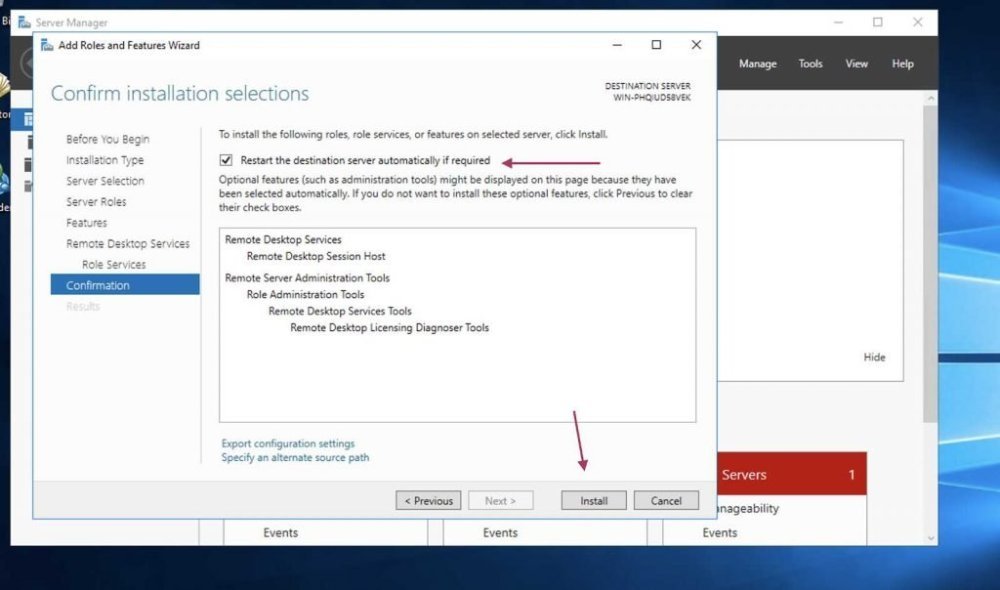
Check the box and click Install.
The initialization process has started.
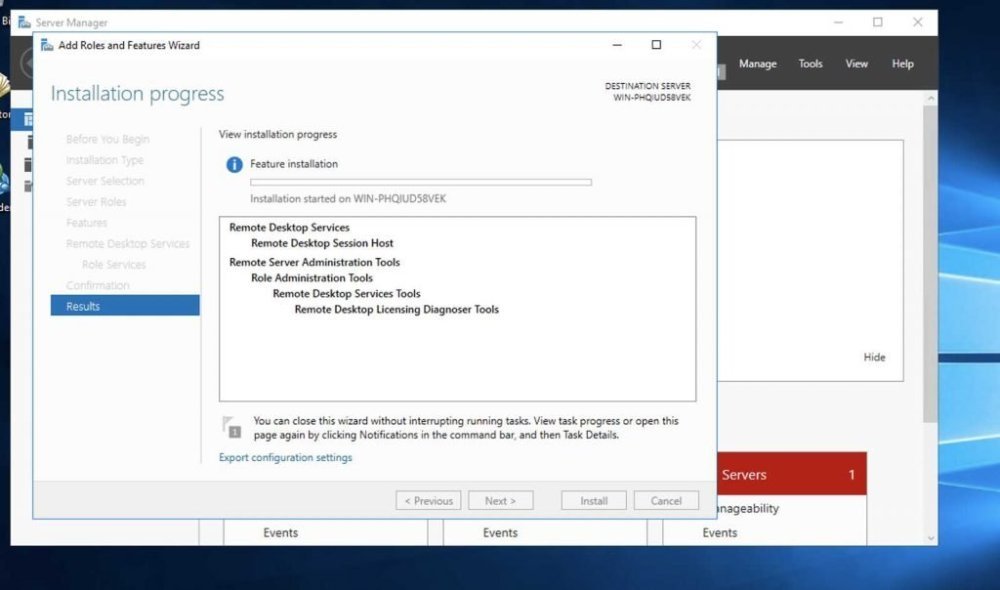
When the initialization is complete , the server will automatically reboot.
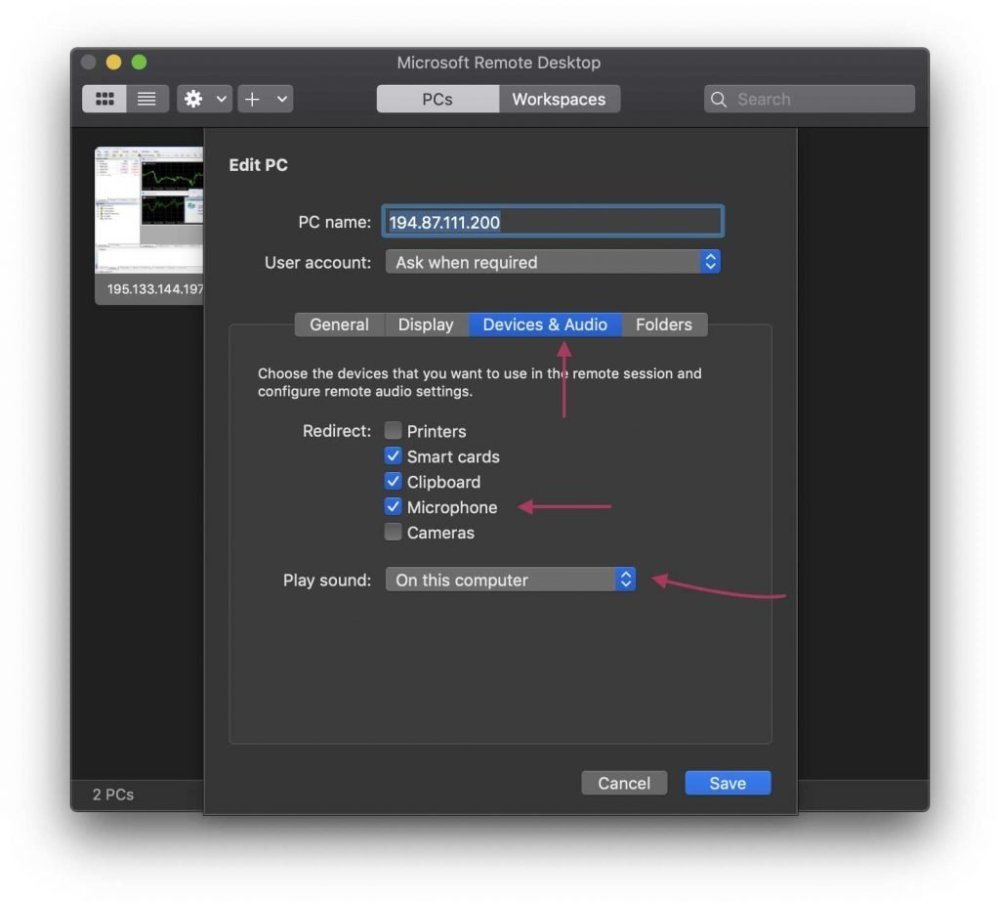
Configuration in MacOS system
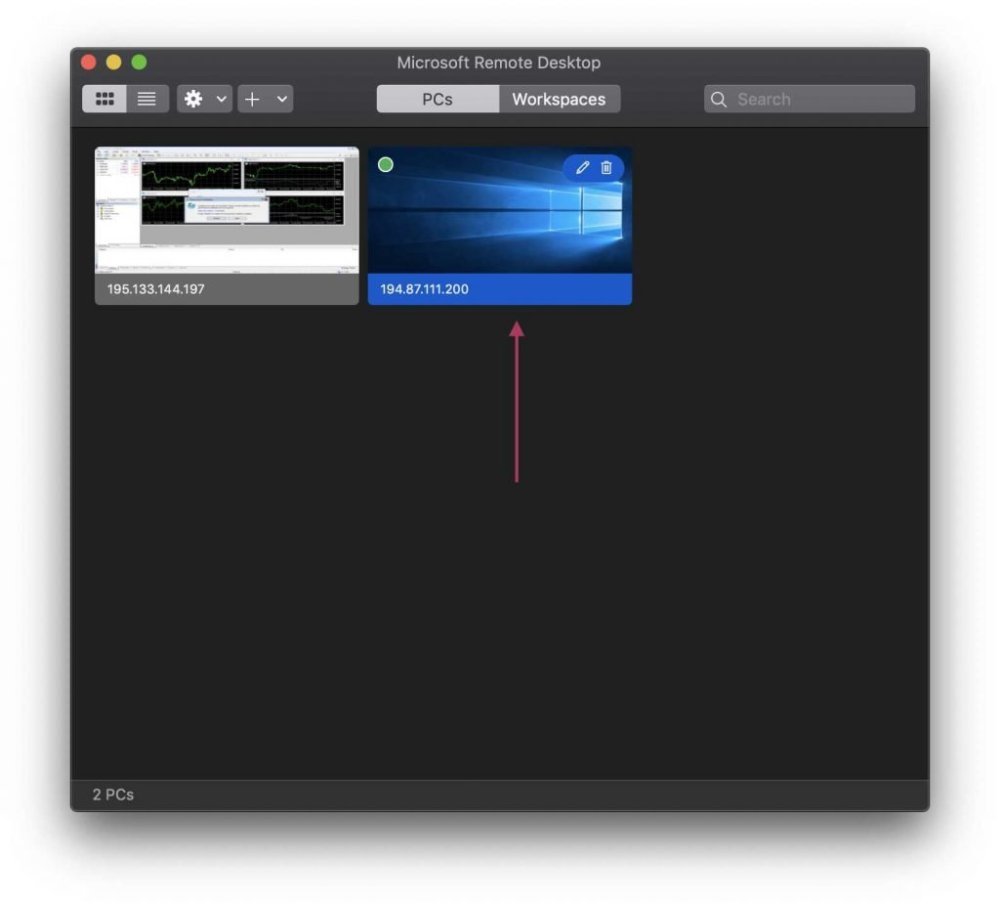
On your PC, go to the program you use to connect to RDP, mark the server where you configured the sound and go to the Edit tab.
After that, check the necessary boxes.
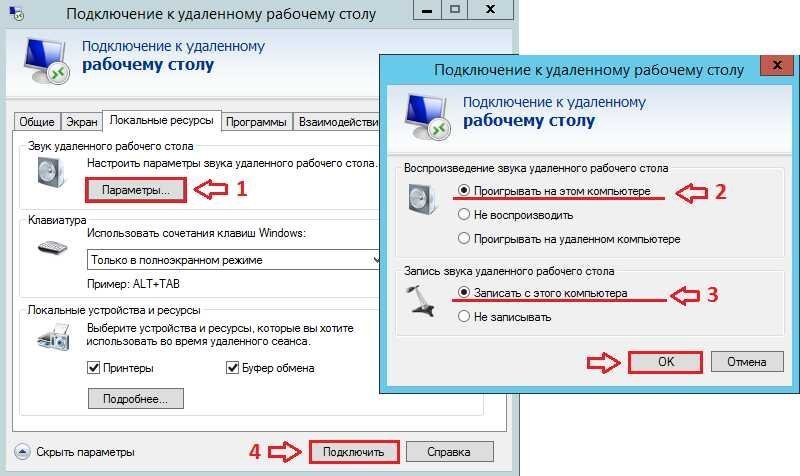
Final settings in Windows
You need to enter the "Remote Desktop Connection" program.
In "General" enter the IP address of your server.
Then go to the "Local Resources" tab - "Options" and in the new window check the boxes "Play on this computer" and "Record from this computer". Then click OK and Connect.
This is the end of the instruction.