


Magento is a powerful choice for scalable projects — from small product catalogs to large eCommerce systems with advanced filters, analytics, and integrations. Yes, it requires a bit more server power and attention than simpler platforms, but with a VPS from THE.Hosting, setting it up becomes much easier. Let’s walk through how to get Magento up and running in just a few steps.
Step One — Log In to Your Account
1. Go to THE.Hosting and log in to your control panel. You’ll find your login credentials in the email you received when you registered.
2. In the panel, open the “Virtual Servers” section. Here you’ll see a list of your VPS instances. Select the one you want to use for Magento and go to its settings.
Don’t Have a Server Yet?
No problem — here’s how to order one.
2.1. On the homepage, choose your server location. It's best to host it close to your main user base — that way, pages will load faster, and search engines will appreciate it too.
2.2. Choose a hosting plan. Magento is a resource-heavy system, so it’s a good idea to pick a plan with extra capacity — especially if you plan to manage a large catalog, integrate payment systems, or connect a CRM.
2.3. Set your parameters, choose the rental period, and place your order. Once payment is complete, the server will be ready — and you can move on to installation.
Installing Magento — The Easy Way
3. In the server control panel, open the “Virtual Machines” section.
4. Click the three-dot menu next to your virtual machine and select “Run Script.”
5. In the search bar, type Magento. You’ll see a ready-to-use installation script — just click it.
6. You’ll now be asked to enter your Adobe account details. If you don’t have an account yet, register here: https://commercemarketplace.adobe.com
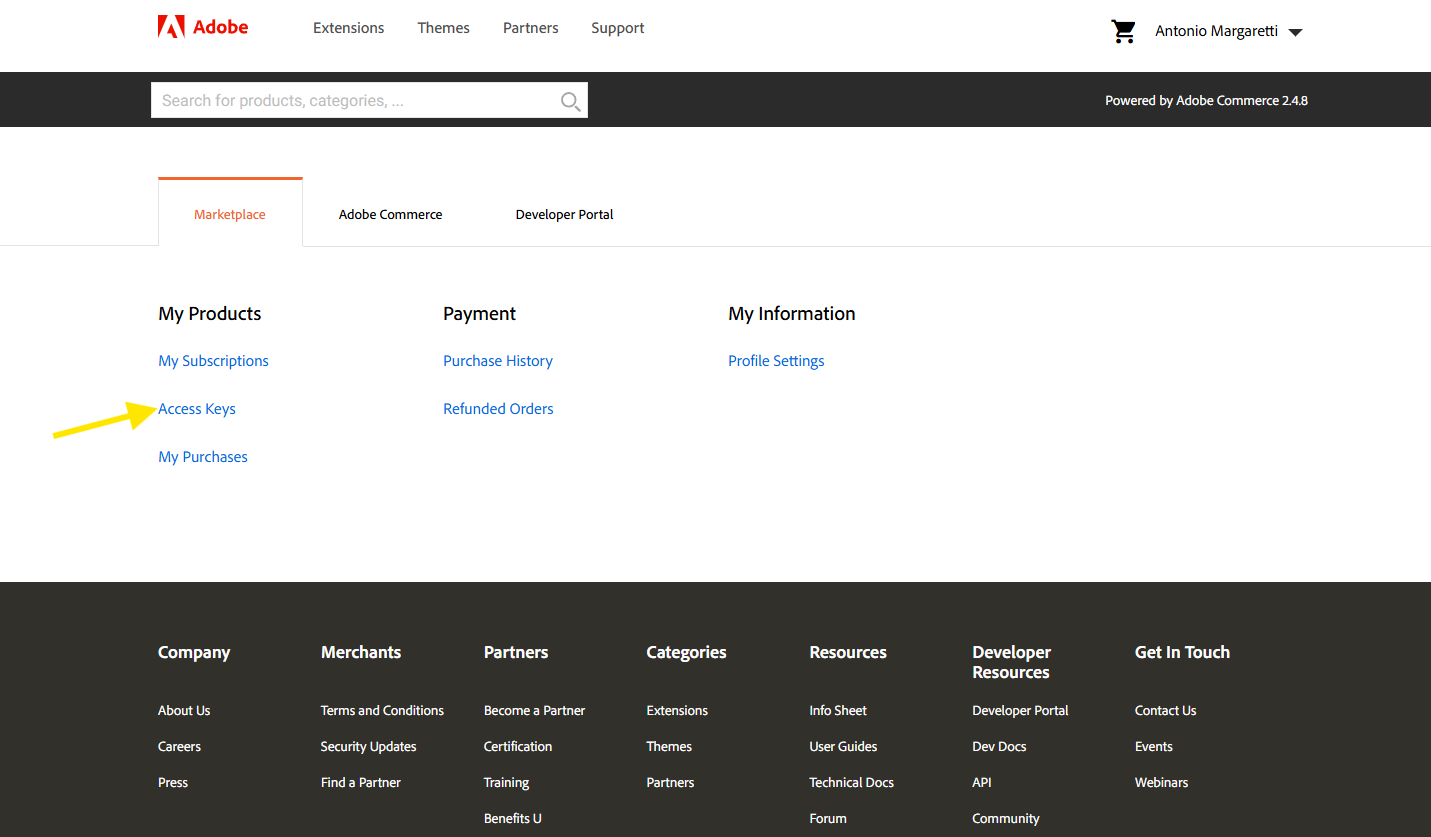
7. Once registered, go to your profile settings.
8. Click “Access Keys.”
9. Click “Create A New Access Key.”
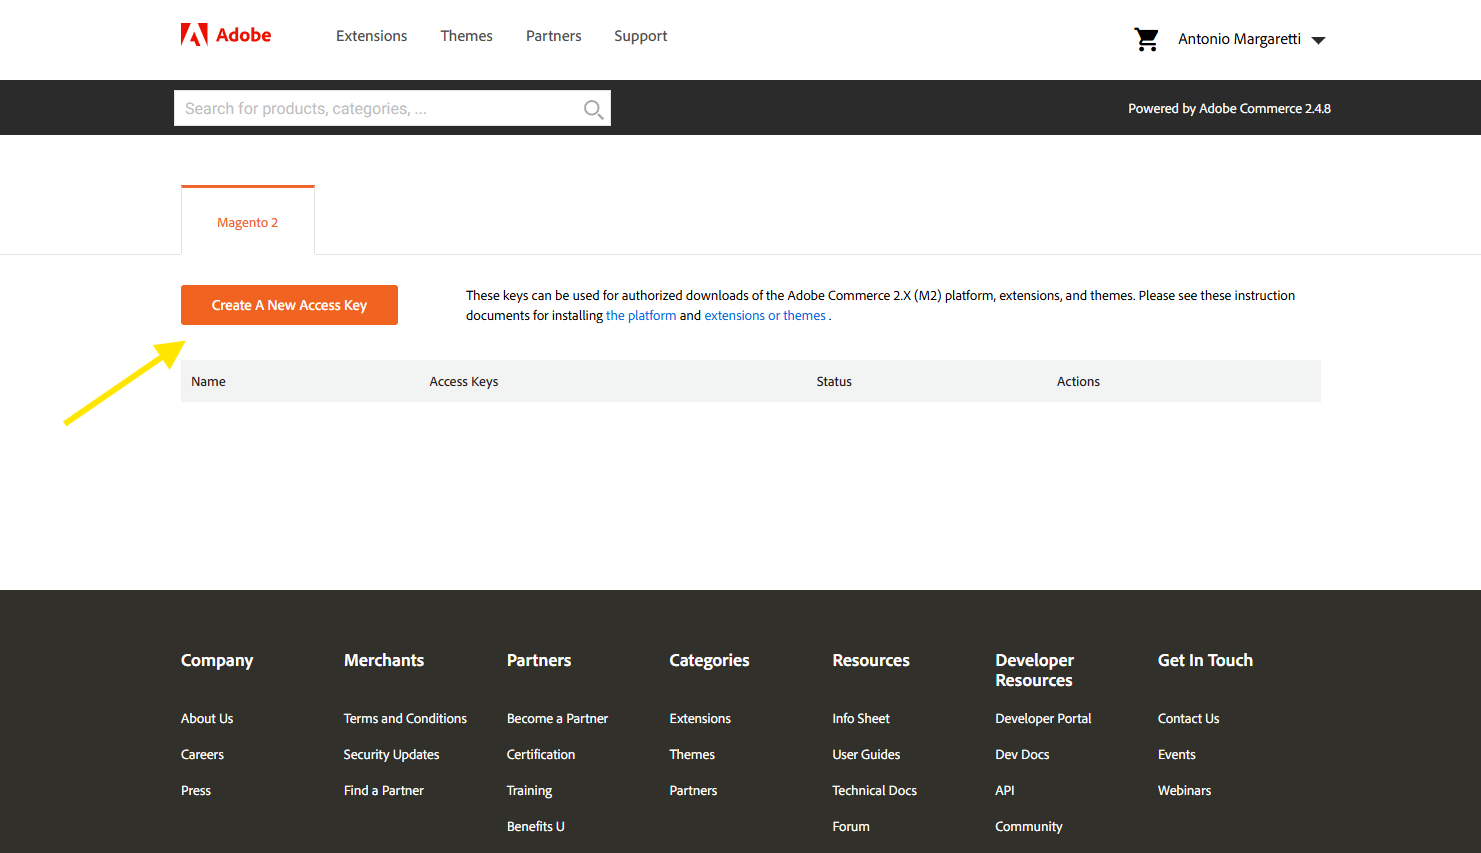
10. Copy the generated key and go back to VMmanager. Paste the access key and password into the corresponding fields.
11. Launch the script.
12. You can track the progress in the “Status” section — the setup won’t take long.
13. Once everything is complete, you’ll receive an email with your login details: username, password, and the admin panel link.
That’s it! You now have a fully functional Magento website — stable, flexible, and ready for action. All that’s left is to customize your store, add products, and start selling.