Webmin is a freeware that allows you to administer servers through a web interface. It provides a user-friendly interface for managing various server settings such as users, groups, files, databases.
Webmin allows you to manage your server from anywhere you have access to the Internet and does not require the user to use the command line or special knowledge of system administration.
Earlier we described what Webmin is, how to install it on the server and how to install an SSL certificate. In this article, we will look at the process of creating a VPN and adding a server key.
VPN creation process
Installing OpenVPN server on Ubuntu 22.04 Let's install the OpenVPN server packages.
To do this, let's execute the command in the terminal:
sudo apt install openvpn easy-rsaBoth packages are needed on both the server and the client if you will be connecting Ubuntu to the OpenVPN server. Nothing else needs to be done. Everything else will be done for us in the web interface.
Installing the OpenVPN management pack on Ubuntu 22.04
Let's move on to the most important part. The website of this module has long been unavailable and the developer has posted the latest version on GitHub.
Install Webmin OpenVPN + CA module. Log in to WebMin via the web interface and go to WebMin Settings, select "WebMin Modules":
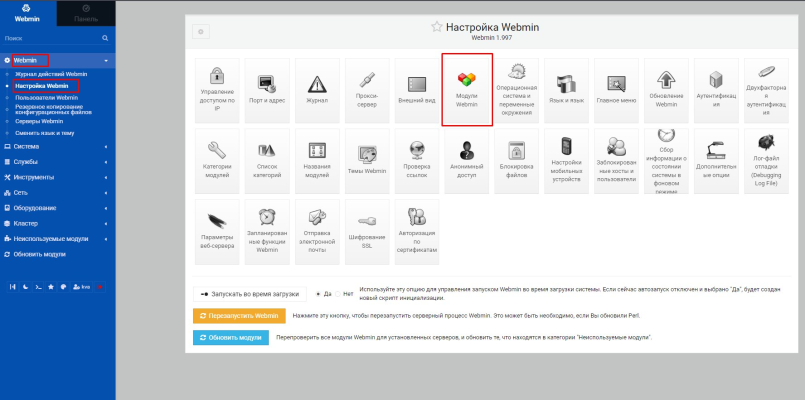
Install the downloaded module:

You need to configure the certificate authority, but we'll fix the installation issue. We can leave everything as it is and proceed to the configuration, then the standard OpenVPN client downloaded from the site will complain that hash algorithm is too weak ("You are using insecure hash algorithm in CA signature. Please regenerate CA with other hash algorithm.") and you will not be able to connect.
The standard hash algorithm of WebMin module is md5, and it should be changed to sha256. Let's go to the ssl config file.
sudo nano /etc/openvpn/openvpn-ssl.cnfNext line default_md = md5 change md5 to sha256 .
default_md = sha256Now the official OpenVPN client will not complain about weak hash algorithm.
Configuring the certificate authority
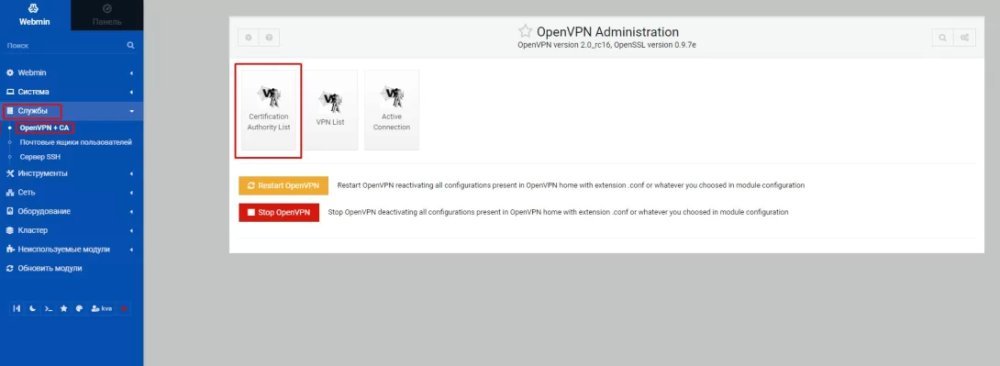
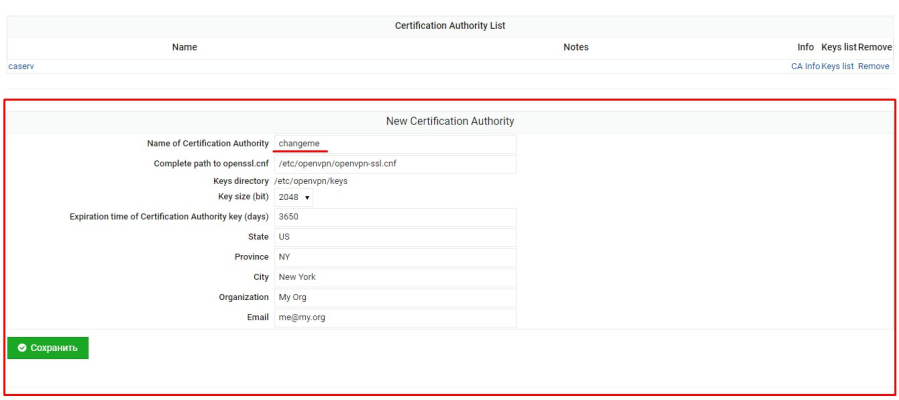
Go to "Services", select "OpenVPN + CA", "Certification Authority List".
Further it is enough to enter the data of the organization or leave it as it is. The main thing is to enter the name of the certification authority by changing the text "changeme".
Save and proceed to adding the server key and client keys of the OpenVPN server.
Add server key and client key
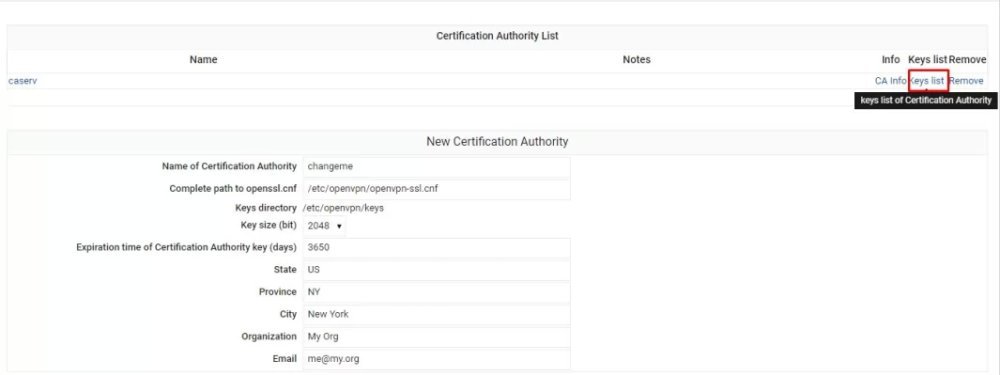
Go to the "Key List"ofour new certificate authority:
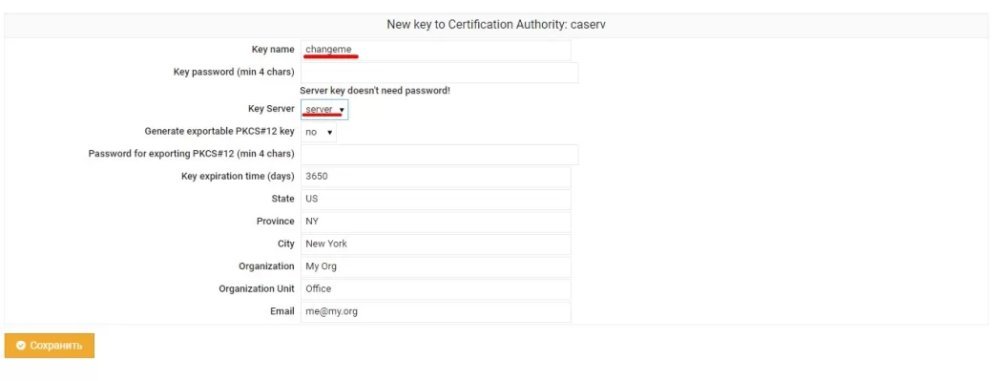
Just one key will suffice for the server, but it needs to be created. You can name it anything you want, for example, "server", no passwords for it. First of all we need to "Server" in "Key Server":
Go to create a key for the client. Go to "Key List", but in "Key Server" choose "Client" and set the password for the client. Name the certificate as you like, you will need to select it later.
